Sunday, 26 July 2015

Trail tote

Yesterday I finished making a bag using Noodlehead's Trail Tote pattern (this pattern is free - download it here).  The download has small and large sizes - so I made my own medium size.


 This bag was nearly finished a week ago, until I decided what it really needed was a bird on the front, and the bird was going to be leather.  Don't ask me where that came from!  I bought a bag of leather scraps and did some experimental sewing.


I hand-stitched the bird on, but next time I think I would machine sew (as long as the leather wasn't too thick) as it's hard to get the stitches neat by hand.  I used the reverse, suede-like side of the leather for this.


Once the bird was done, I thought a finishing touch with a bit more leather was in order.  I chose a slightly thicker scrap from the bag and cut two strips to fold over the top edge, where the magnetic catch goes.  Although these look like they're stitched on, they're glued.  I stitched around the edges (by machine), then put the magnetic snap through the leather and through the complete thickness of the bag.  Then I glued each tab down on the outside.


I highly recommend this pattern (and Noodlehead in general!).  My fabric was thick cotton, with thick interfacing.  The lining is quilting cotton.


Happy summer! x

Saturday, 11 July 2015

Cheerful rainbow quilt

A friend of my daughter's has had to have a pretty major operation, and I wanted to cheer her up when we visited.  So I dragged out a whole rainbow of fabric and my biggest pieces of wadding, and came up with the brightest quilt I could manage!


It needed to be made in less than a week, so had to be a straightforward design, and it had to not need anything I didn't already have lying around (although admittedly I do have quite a lot of stuff "lying around").  I decided on a rainbow, because it's always cheerful.  And to get in plenty of different fabrics and interest, I split each diamond into two triangles.


I cut the triangles last Saturday, and had them all stitched into squares by the end of Sunday.  Cut the background strips and had the quilt top finished by the end of Wednesday (when I may, or may not, have been working at home).  


Quilted Thursday afternoon, bound Thursday evening (in pale grey, by machine, no time for hand finishing on this one!).  Photographed in our garden on Friday morning, where there are loads of co-ordinating flowers at the moment, and delivered to the hospital by 11am the same morning!  It was very well received I am pleased to say.


This one's a win-win - a cheerful present and a really good use for some of that huge pile of fabric.  Can't see the difference in the pile of fabric though!

Vicky xx


Sunday, 5 July 2015

Front door-to-be

Three years after my first go at stained glass, I've made another piece.  Been meaning to make another piece ever since that course, but you know what happens.

Anyway, the plan is for this to become a window in our new front door.  We have to get the door made first, now that we know how big the window is! (I expect the professionals make their windows to fit the gaps, but I'll move on to that later...)


It was inspired by this window that I saw in Hobbiton, New Zealand


It has a bit of 1930s look to it, but with a Hobbitty twist - nearly every door and window in Hobbiton has a lovely little detail like this.  Here's a closer look:


The Hobbiton window is all plain glass, but I've mixed it up with some colours and some red spots.  The lead is 6mm - I started off with 4mm (nightmare, too fine for my wobbly glass cutting!) and couldn't get any 5mm quickly, so settled for the 6mm.  Now it's done it looks fine, but next time I'll try the 5mm.  I have plans for new bathroom door windows!

Soldering was a bit of an issue too.  Once it's a window it will be harder to notice the textured solder, but I definitely need to improve my technique.


Vicky xx

Friday, 8 May 2015

Hexagons quilt

Well this one took a long time!  I love the colours, and hexagons are my favourite shape, so that doesn't matter.


It's based on Science Fair (Jaybird quilts), but I wanted use my left-over Kaffe Fasset shot cottons, which were all muted colours from a sample pack.  (I used all the bright colours in this star quilt). There are a few spotty prints mixed in there too.
I also chose my own size for the quilt - maybe the only thing I did the same as Science Fair is the construction method!


The negative space is a khaki chambray from Village Haberdashery in London, which may no longer be in stock.  The backing is a Kaffe shot cotton, possibly called Blueberry.


I quilted in straight lines about an inch apart on the negative space, to keep the quilt soft.  On each hexagon I quilted six radiating lines, and a circle at the edge.  This quilting is not so obvious on the front, but stands out nicely on the back.


Very pleased with the colour scheme on this one!  One final summery picture!


Friday, 1 May 2015

Zip top purse on Village Habby blog

Today is the first time I've had something I made featured on another blog - in this case, The Daily Stitch which is the blog of the Village Haberdashery in London, run by Annie Barker.

Featured is a zip-top purse I recently designed, shown here made with Essex Linen and other yummy fabrics which Annie sent me for this project:


Particular features to note are the wide opening at the top, and TWO pockets inside!!  One slip pocket, one zip pocket.


You can customise the exterior however you want, and even change the inside pockets around to suit whatever purpose you have in mind.


You can find the tutorial here - zip top purse tutorial.  If you have any questions or comments, do get in touch - I'd love to see what you make!

Vicky x

Monday, 2 February 2015

Bunk beds

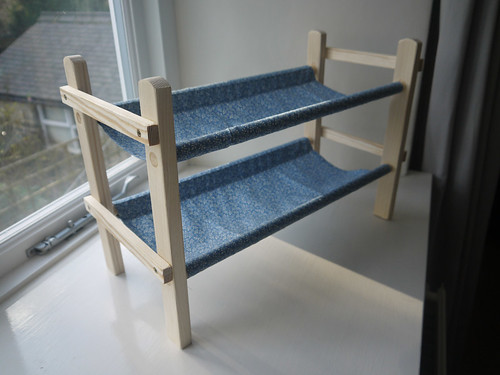
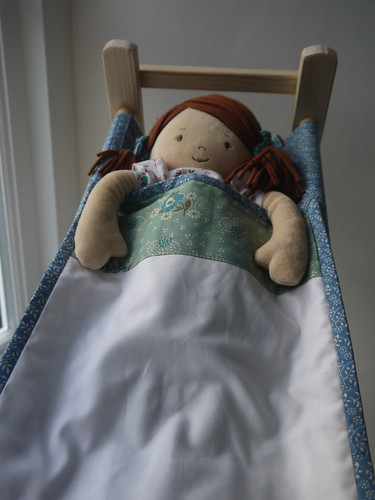
For Christmas, my daughter had twin dollies on her list, and obviously they needed bunk beds.  My husband made the bed frame, and I made the fabric bits - hammock beds and quilts!

P1060589

Fran and Katy are 40cm dolls (made by this FairTrade company), so the bunks are about 50 cm long and 20 cm wide.  They seem to sleep well in them, in fact some days they don't get up at all.

P1060604

Each little quilt is 25cm x 30cm, made with quilt batting and binding, but no quilting so they're not too stiff.

P1060602

Sweet dreams, girls xx

Thursday, 22 January 2015

Zippy trippy three

This one was a Christmas present, which worked out really well.  Slightly smaller than Zippy Trippy and Zippy Trippy Two, to make it easier to get through the machine when stitching the central piece once the cardboard has been placed inside.

P1060543

On the front is a bird which may (or may not) be a peacock, on a red background with quilted straight lines.

P1060537

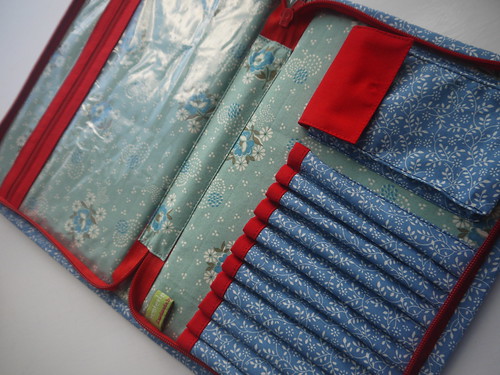
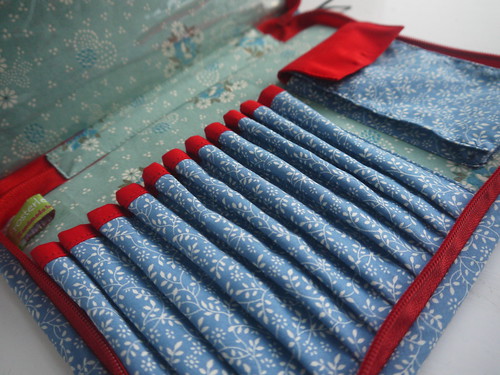
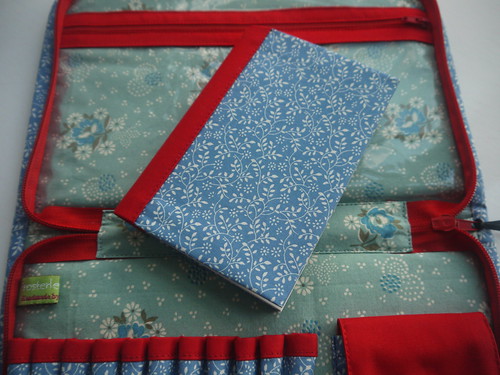
Inside, the usual clear pocket on one side, and on the other a whole load of pencil slots and a small pocket.  I was particularly pleased with my colour choices for this one, especially the red edge on the pencil slots!

P1060548

P1060539

Also, for this one I covered a small notebook to match, giving it a red spine.

Although there's a lot of work in these pencil cases, they are very satisfying to make.  As before, this is a modification of Anna Graham (Noodlehead)'s Road Trip pattern.  Love your pattern Anna!
Related Posts Plugin for WordPress, Blogger...