Showing posts with label Applique. Show all posts

Wednesday, 19 April 2017

Fishy on a dishy

I made more mats!  About three years ago I made a mat to put pans on (here) - well now it has eight cousins to go on the dining table.

P1160017

These are made with a top layer of linen (actually some napkins I bought and chopped up), a middle layer of quilt wadding, and a cotton backing.  Each fish outline is machine stitched, and the spots (Kona solids) added by applique-ing and free-motion machine embroidery.

P1160015

Creating the fish was the first step, stitching through both the linen and the wadding.  Then I stitched the backing on (right sides together), turned through, and stitched around the edge making a 1cm border.  Such a simple process, I can't imagine why it took me 12 months to finish them!

P1160031

As before, I must credit Syko for inspiring this fish design, but I hope I have added something here!  Each fish has different coloured spots, two of one colour plus two other colours.  The white thread is a thick top-stitching type for extra definition.

P1160024

Vicky xx

Tuesday, 3 November 2015

Second trail tote

Following my birdy trail tote, here's one with a leather flower - a commission in orange spotty linen.  The pattern is by Noodlehead (and it's free! here)

P1110456

This one's the same size as my blue birdy one (that's medium, which isn't in the pattern).  It has grey piping, and a grey strap, and leather details - an applique flower and tabs for the magnetic snap.

Inside, the lining is an Ikea furnishing fabric.

P1110454

As before I used the suede-y back of the leather for the flower.  I tried to machine stitch it on but got lots of skipped stitches, so went back to hand sewing - need to work on this as machine stitching would be so much quicker.


The recipient was very pleased with her bag, so a success all round.  I've made lots of things lately that haven't got blogged, so there will be more posts very soon!

Vicky xx

Sunday, 26 July 2015

Trail tote

Yesterday I finished making a bag using Noodlehead's Trail Tote pattern (this pattern is free - download it here).  The download has small and large sizes - so I made my own medium size.


 This bag was nearly finished a week ago, until I decided what it really needed was a bird on the front, and the bird was going to be leather.  Don't ask me where that came from!  I bought a bag of leather scraps and did some experimental sewing.


I hand-stitched the bird on, but next time I think I would machine sew (as long as the leather wasn't too thick) as it's hard to get the stitches neat by hand.  I used the reverse, suede-like side of the leather for this.


Once the bird was done, I thought a finishing touch with a bit more leather was in order.  I chose a slightly thicker scrap from the bag and cut two strips to fold over the top edge, where the magnetic catch goes.  Although these look like they're stitched on, they're glued.  I stitched around the edges (by machine), then put the magnetic snap through the leather and through the complete thickness of the bag.  Then I glued each tab down on the outside.


I highly recommend this pattern (and Noodlehead in general!).  My fabric was thick cotton, with thick interfacing.  The lining is quilting cotton.


Happy summer! x

Thursday, 22 January 2015

Zippy trippy three

This one was a Christmas present, which worked out really well.  Slightly smaller than Zippy Trippy and Zippy Trippy Two, to make it easier to get through the machine when stitching the central piece once the cardboard has been placed inside.

P1060543

On the front is a bird which may (or may not) be a peacock, on a red background with quilted straight lines.

P1060537

Inside, the usual clear pocket on one side, and on the other a whole load of pencil slots and a small pocket.  I was particularly pleased with my colour choices for this one, especially the red edge on the pencil slots!

P1060548

P1060539

Also, for this one I covered a small notebook to match, giving it a red spine.

Although there's a lot of work in these pencil cases, they are very satisfying to make.  As before, this is a modification of Anna Graham (Noodlehead)'s Road Trip pattern.  Love your pattern Anna!

Wednesday, 26 November 2014

Tu-whit tu-whoo!

How about this bag with an owl looking after the front?

P1060403.JPG

I sewed this one up just before I was taking my bags and purses to a Christmas sale, using Noodlehead's (free!!) trail tote pattern for Robert Kaufman.  I'd had the idea of a bag with an owl on the front flap for ages, then I saw this round-based bag pattern and thought it would work really well.

P1060408.JPG

Of course, the Noodlehead pattern doesn't have a front flap, so I made my own pattern piece for that.  I also missed out the piping as I was working with velvet and fleecy interlining, so had enough bulk to contend with already! When I make the pattern with lighter weight fabric, I'll definitely use piping because it gives such a lovely finish.

P1060407.JPG

I also did something different to sew my strap on than the pattern says.  I find it easier to stitch the strap to the outside seams of a bag, before the lining goes in - that way, there are fewer layers to get the machine to stitch through when you go around the top edge.  Also, when you open the bag the strap then falls away from the opening.

owl

Finally, instead of using a magnetic snap to close the bag (I didn't have one handy), I added a small ribbon loop in the back seam with a big popper on.  That means the bag can be closed without the owl on the lid being pulled out of shape - it can just hang around being an owl!

Wednesday, 22 October 2014

Zippy trippy two

It was kind of inevitable - once one child had one, the other wanted one! So here's my second Zippy Trippy (based on Noodlehead's pattern).

P1060282

This one has a denim outer, with (by request) a USB symbol on. Inside there's the same vinyl pocket as before, some pencil slots, and also some small pockets for memory sticks and calculator. The binding and pockets are made with some really cool circuit board fabric that I found.

P1060276

Both Zippy Trippies are in regular use I'm pleased to say. They're a bit of a faff to make, especially sewing that last central piece in place once I've put cardboard in the front and back (I don't think the Noodlehead pattern uses this), but worth it. I'll never get tired of zipping that zip all the way round!

P1060281

This might be the last one of these I make for a while. Seeing them being used makes it worth the effort of completing them, but they're still a whole lot of work! My next project is a pattern that's all my own....watch this space....

Saturday, 9 August 2014

Zippy trippy

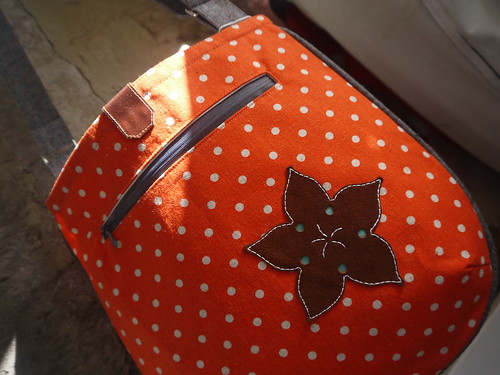
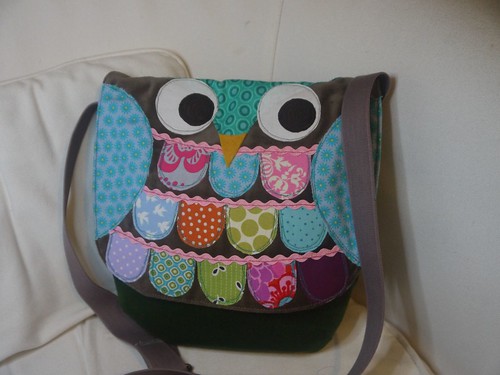
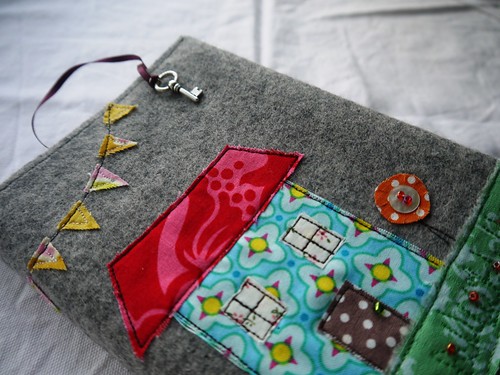
If you've seen Noodlehead's road trip case, I bet you like it - I did. So I made one, and here it is!

P1050693

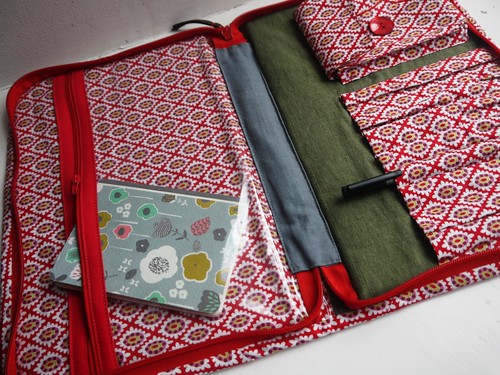
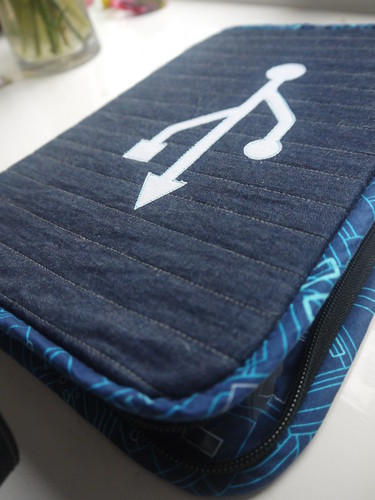
Anna's pattern is for a case that will store craft bits, but I wanted mine (well, my daughter's, let's be honest I'm a bit old to be see with cute things like this!) to hold pens, pencils, scissors and notebook etc. So it needed a zip all the way round, so that when it's closed the notebook is enclosed in the middle and doesn't fall out.

P1050691

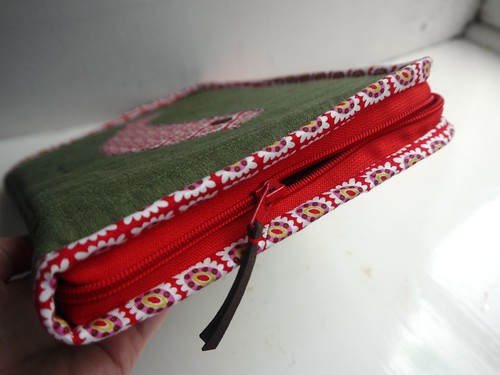
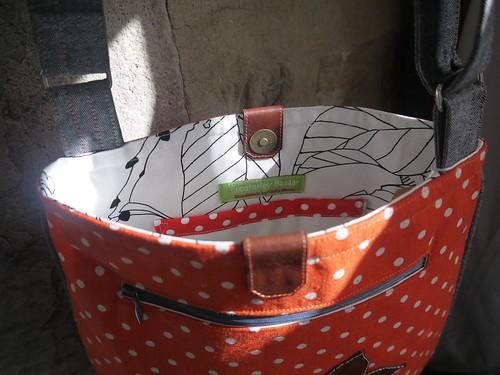
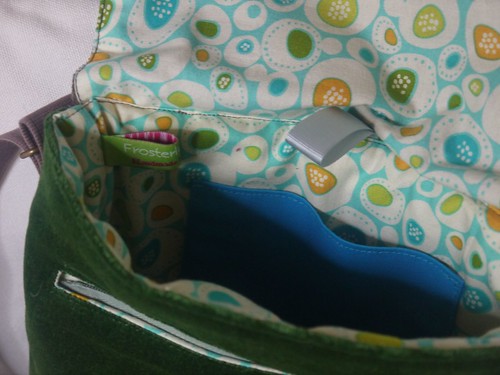
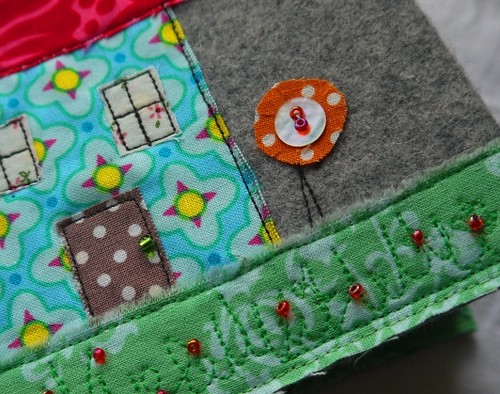
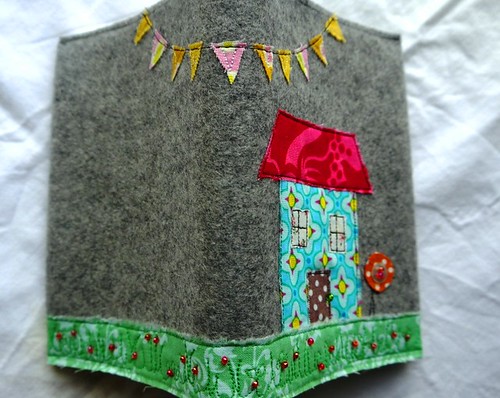
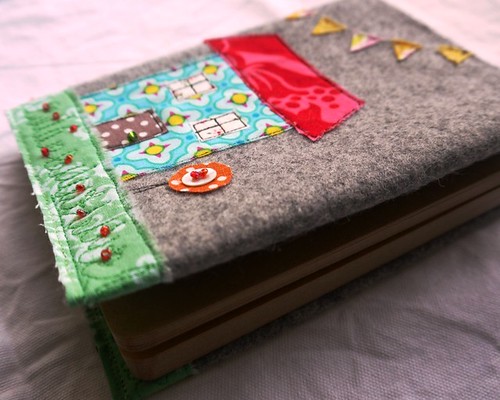
To apply the zip (it was a VERY long one, about 80cm) I stitched it all the way around the edge with a small seam before I applied the binding to the edge. Then I stitched the binding on top, pressed, turned to the outside and hand-stitched down. To cover the ends of the zip in the centre of the case I machine stitched a rectanlge of linen along the centre fold (you can see it in grey in some of these photos).

P1050689

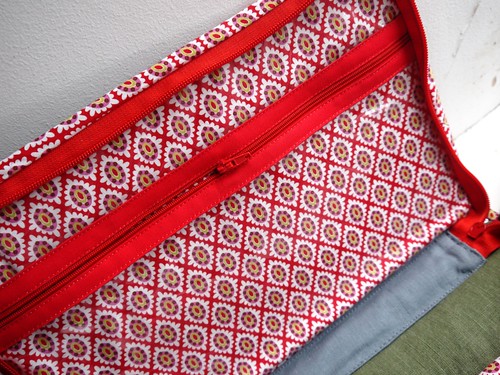
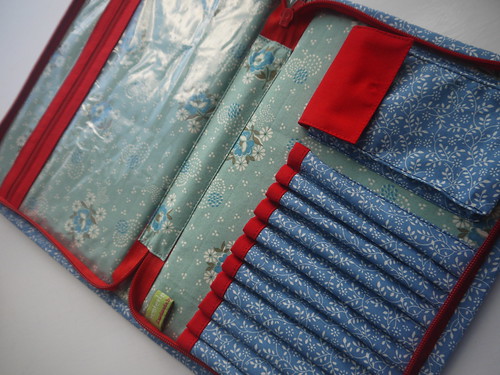
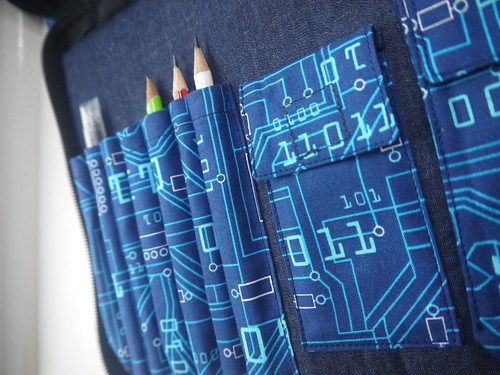
I love the big vinyl pocket, I'd never sewn vinyl before but it was fine. I think I did use the walking foot for some bits to make sure it moved smoothly under the presser foot. This is such a great idea for a pencil case, to be able to see what's lurking in there! If you're in the UK, I got my vinyl from Dunelm, but I expect there are other places selling it too.

P1050688

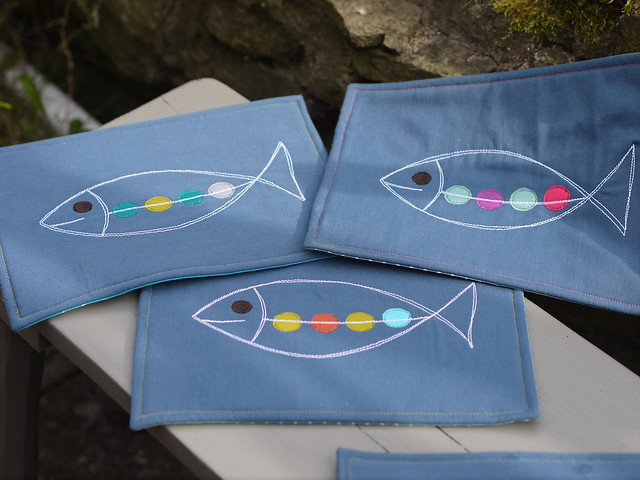
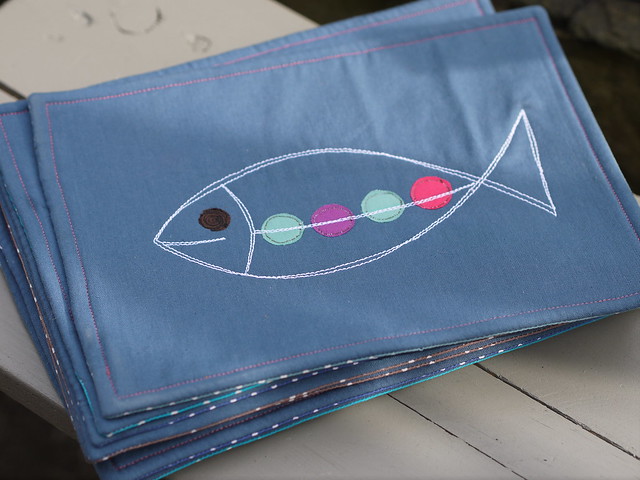
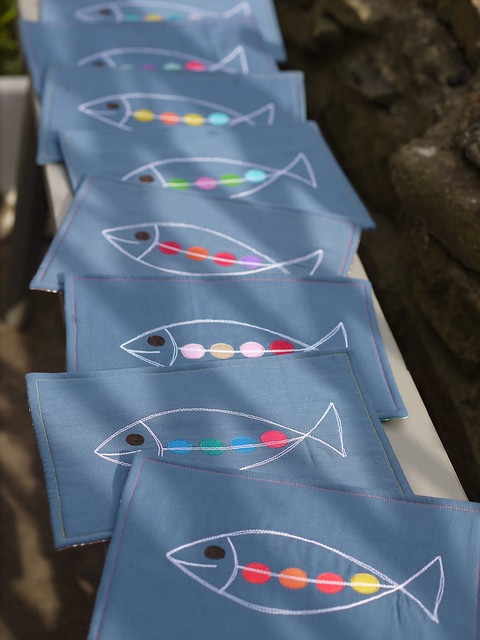
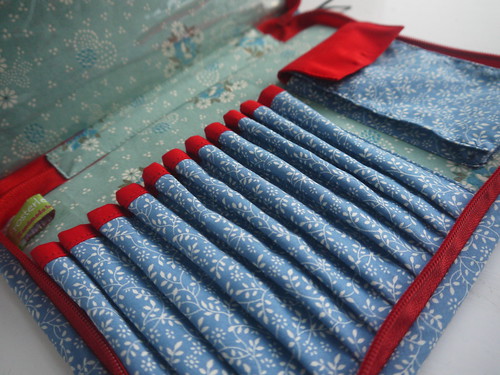
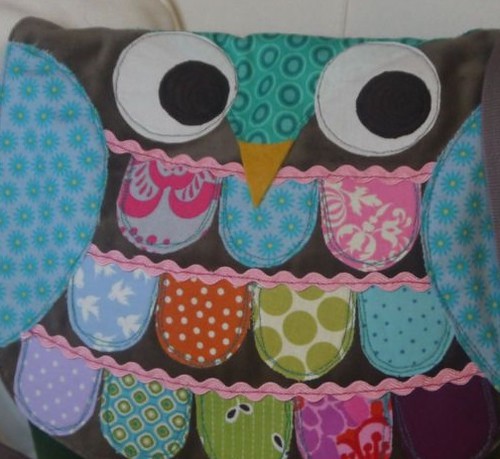
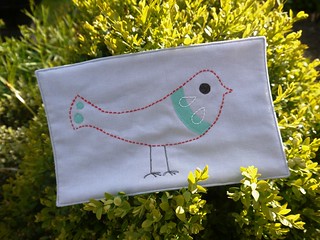
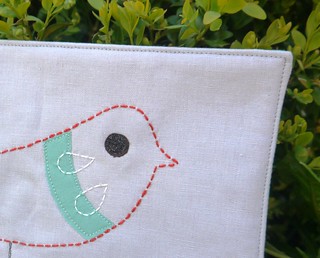
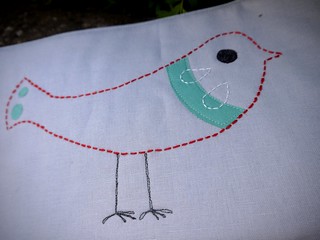
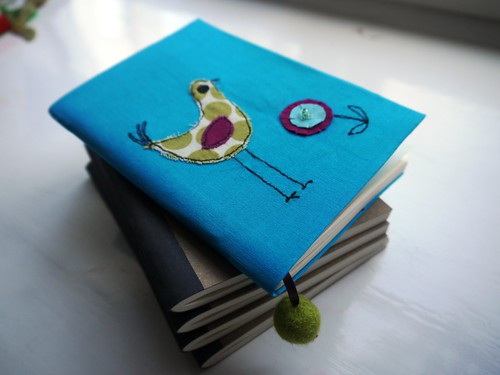
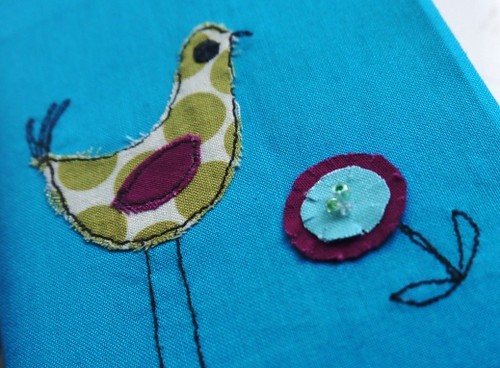
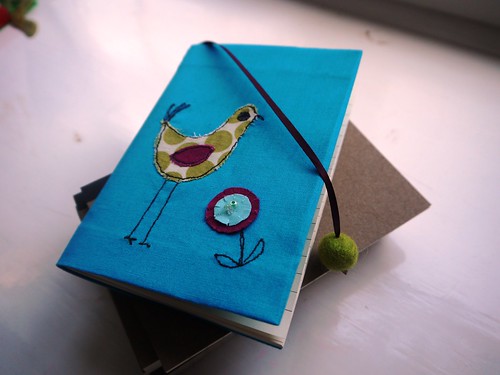
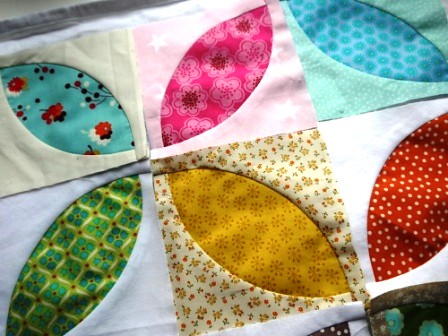
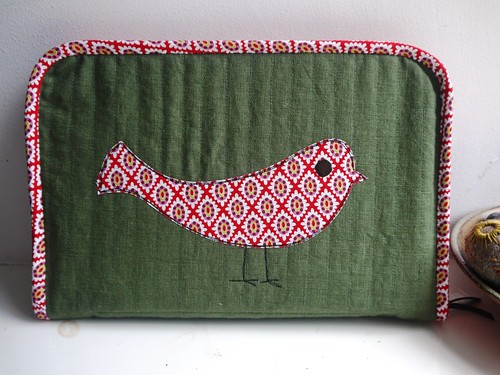
At the bottom I sewed eight slots for pens or pencils, and a larger pocket for a calculator or small cards etc! And on the front, I couldn't resist adding my current favourite birdy! (Originally seen on this mat I made).

P1050686

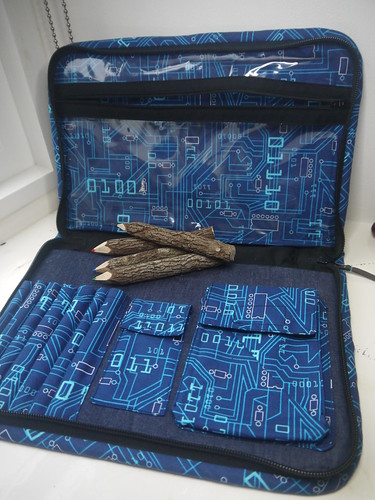
Next on my list is a boy version, for Thomas (well, after I've finished a few other urgent jobs like a summer dress in denim, a Sew Together bag, etc). He wants to use some rather funky circuit board fabric I found him a while ago....

Sunday, 25 May 2014

Second kitchen mat

I love my fish kitchen mat so much, I made another one this time with a bird on. The bird motif came from an IKEA print that I love - hoping IKEA won't mind me hacking this!

P1050155

As I didn't have thick red machine thread to make the outline of the bird, I used my sashiko thread and needle to make the outline in running stitch. Then I used fusible web and machine applique/embroidery to add the neck stripe, eye, spots and legs.

P1050153

The front is some pale grey linen, and the back is Kona aqua. Inside are two layers of natural batting, with heavy quilting onto the back fabric.

P1050152

And I'm so excited that my runner beans are growing (and the slugs haven't got to feast on them yet!!) that I'm sticking a picture of them in too!

P1050158

Thursday, 13 March 2014

A hot mat for the kitchen

For a quick, quilty fix, I made a new mat for the kitchen last week.


This fish was inspired by the lovely drawings on Syko's blog.  (And by the way, the long gap since my last post is due to all my spare time being spent working on a quilt which will hopefully appear in a magazine later this year!)


I pieced together some scraps of leftover quilt batting for this mat, enough to make two layers. Then I sewed the fish onto a piece of linen layered onto one piece of batting, and quilted the backing fabric onto the second piece.


After, I cut both to the same size and sewed them right sides together. To finish, turn right side out, stitch opening closed, and topstitch. One mat, ready for a hot pan or dish in the kitchen - and washable!


These look like they would make good little presents - Mother's Day is coming up, and I have friends moving into a new house they're building soon, so I think I'll be making more.

P.S. If you use Instagram, I'm now on there - frosterleybazaar.

Friday, 20 December 2013

Velvety velvet

I love velvet - smooth one way, slightly rough the other way; soft, elegant and lovely. That said, it can be tricky to sew because the 'nap' means when the pieces are right sides together they want to move in opposite directions. Velvet is not a slidey fabric!

This week I've been busy making more velvet purses. I designed the pattern and applique for these over a year ago, but still have lots of un-used purse frames. These might make last-minute Christmas presents, and some are going into my Etsy shop. As well as for coins, I think these would make a lovely jewellery case - for a necklace, bracelet or rings, for example.


The machine embroidery on these is done with the feed dogs down, so I can trace around these flower petals by moving the fabric in any direction under the needle. It takes a bit of getting used to, but for designs like this it's essential - this would be so difficult to sew using straight stitching!


In the centre of this flower (and the one on the blue purse) I've added a small shell button and tiny seed beads, by hand. All of this embellishment is done before I stitch the two pieces of velvet together to make the purse outer.


Once the lining is made I press the seams, place the lining inside the outer, press the top edges inwards and oversew them together. Then it's time to glue the purse into its frame, which takes a bit of patience! I like to glue the front in first, because it's usually slightly easier to get a neat and tidy glue-free finish on the first side you do. And if there's going to be glue on the velvet, I'd rather it was on the back (although you can remove tiny bits with nail polish remover).

If you like these, please do look in the shop!

Sunday, 1 December 2013

Covered journal notebook

I've been working on some new notebooks, this time with some wonderful woven felt from RayStitch, and machine applique.

P1040464

I first stitched this design for a New Home card for a friend, and liked it so much I made another one to keep straight away. And I still like it, so I'm using it again! I found these tiny key charms to tie on the end of a ribbon bookmark.

P1040469

The garden, made with free machine embroidery, buttons and beads.

P1040470

The garden and the bunting wrap around to the back of the journal, for extra interest.

P1040479

P1040475

Now for sale in my shop, if you would like your own!

Saturday, 28 September 2013

Birdy book

Had an hour or two spare today, so I had a play with machine embroidery. I've made notebook covers before, but only with patchwork, but I see more covers with pictures coming soon!

P1040092

I make my covers using pretty much the same method as Rachel at Stitched In Colour - a link to her tutorial is here.

The colours in these photos aren't great (summer's over!) - this blue cover is a deep turquoise, and the bird's wing deep pinky-purple. These notebooks are about A5 size. I've added a ribbon bookmark with a felt ball on the end. In fact seeing the bag of felt balls, which I've had for months but haven't got round to using (but they're lovely to play with - get yours from Blooming Felt), inspired me back into notebook-covering.

P1040094

Next time I'm going to use Bondaweb to make sure there's not so much fraying on the bird shape - this time I used my standby Pritt stick. Well, it works!

P1040096

Watch this space for more notebooks soon x

Saturday, 9 March 2013

Not orange peel

Well, I had in mind to make a beautiful "orange peel" quilt like AmandaJean at Crazy Mom Quilts - as soon as I saw her pictures I thought this quilt was fabulous. But I thought all the applique would take ages, so started thinking about how I could piece it by machine.  Back in September (?) I got out all my favourite fabrics and sorted them into strong colours (for petals) and soft colours (for backgrounds)...

P1010589

I'd never sewn curved pieces together, but how hard could that be? I drafted some templates and started cutting up lots of lovely fabric! A few goes later and I had templates and a technique that worked, so I set to work making petal blocks - here they are! (apologies the following photos aren't very good quality, blame it on the grey sky we have here today)

<P1020229

P1020231

Then: trouble. I sewed two together; they looked lovely. Another two, ditto. Then I tried putting the two together into a square. It looked good, but now I realise why everybody else who's ever made an orange peel quilt has appliqued the petals, not pieced them.  The seam allowances are the issue, where they all cross in the middle I got the biggest stack of fabric you can imagine. It was difficult to sew and it wasn't going to work.  So don't try it at home! Go for applique, or read on!

What was I going to do? If I couldn't sew these blocks into a quilt top I'd either have to abandon them, go down the applique route, or come up with another plan.
I came up with a plan!  Which was to use the blocks, but in a different layout, so that all those bulky seams were a bit more spread out.  By putting two together as a pair of leaves and stacking these into columns I think I've solved my (self-imposed) problem.  More when I have a bit more put together!

P1020234
Related Posts Plugin for WordPress, Blogger...