Showing posts with label Sewing. Show all posts

Wednesday, 5 July 2017

Voile scarf

This is a quick one - I finally got back to sewing.  Seasalt (nice clothes) now sell some of their prints as yardage, on voile!  Good news if you like their prints, which I do.  I wish Boden would do this too.

IMG_1147

So a while ago I bought a big chunk, intending to make some tops for me and Kitty, but that hasn't happened yet.  This fabric is silky and soft, and probably as light as Liberty lawn.

IMG_1142

When I saw some giant turquoise pom-pom trim in Boyes, I could tell it would go very very well with this print - it was crying out to be a scarf!

IMG_1143

I have plenty of fabric, so I cut a strip off (40cm long, full width), hemmed it and put on the trim, job done!  Two metres of bobbles was enough to do both short ends and one long side.  There should still be enough left to make a Sorbetto top for Kitty (free pattern from Colette!), and possibly one for me.

IMG_1153

I know what I'll be wearing all summer now!
Vicky xx

Thursday, 4 May 2017

80th birthday quilt

Well, it's been a while since I made a quilt!  I've been sewing clothes, but not blogging them - I find them very difficult to photograph well.  A quilt, on the other hand, I love to take pictures of.

P1160074

This one is a present for my mum, for her 80th birthday, which was last weekend.  I've managed to use up a great deal of stashed blue fabric making this (although there still seems to be a whole lot left...), and have only had to buy a metre of Kona white to complete the front.

P1160068

For the back I needed to buy a three metre length (it's Dashwood Twist in teal), and of course the wadding (Dream Request).  Luckily I had some fabric that worked for the binding already (two prints which were similar enough I could mix them together).

P1160066

I was rushing to finish this in the end, and finished stitching the binding down on the car journey south (I wasn't driving).
Here's the quilt on a chair Mike's just completed, it's the same design as this one.

P1160086

Vicky xx

Wednesday, 19 April 2017

Fishy on a dishy

I made more mats!  About three years ago I made a mat to put pans on (here) - well now it has eight cousins to go on the dining table.

P1160017

These are made with a top layer of linen (actually some napkins I bought and chopped up), a middle layer of quilt wadding, and a cotton backing.  Each fish outline is machine stitched, and the spots (Kona solids) added by applique-ing and free-motion machine embroidery.

P1160015

Creating the fish was the first step, stitching through both the linen and the wadding.  Then I stitched the backing on (right sides together), turned through, and stitched around the edge making a 1cm border.  Such a simple process, I can't imagine why it took me 12 months to finish them!

P1160031

As before, I must credit Syko for inspiring this fish design, but I hope I have added something here!  Each fish has different coloured spots, two of one colour plus two other colours.  The white thread is a thick top-stitching type for extra definition.

P1160024

Vicky xx

Sunday, 9 April 2017

My vintage Singer

About 20 years ago, I was given this sewing machine by a friend - it had belonged to her mother, and she wanted it to go to someone who would use it.  On and off, I have used it, but I feel I should do more sewing with it as it's such a lovely machine.

IMG_1037

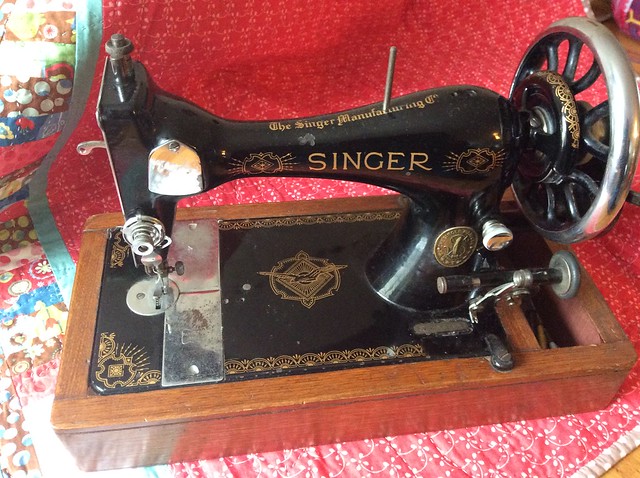
The serial number dates the machine casting to 1898, but the patterns in the enamel don't fit with other machines of that age - they look much more like 1930s graphics.  So it's exact age is a mystery, but it's probably at least 90 years old.  As it's made of a lump of cast iron it's very heavy, but as long as you don't have far to carry it this is an advantage, as the machine doesn't wobble or rattle.  When in action the noise from it is a gentle PRRRRRR, with a rhythmic clicking as the needle moves up and down.

IMG_1040

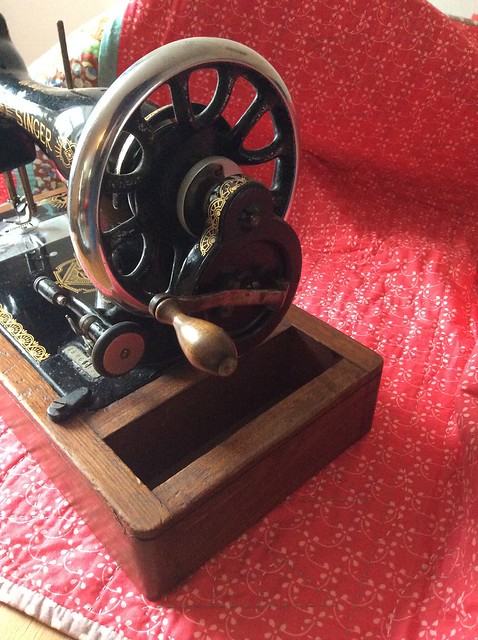
At the right hand end are the fly-wheel and hand crank - the fly-wheel does two jobs, because it helps to keep the machine running smoothly as you crank it, but it also winds the bobbins if the bobbin-winder is pushed forward so that it's rubber wheel runs on the rim of the fly-wheel.  So clever - and, you can disengage the needle mechanism while you wind your bobbin, just as on modern machines.

IMG_1043

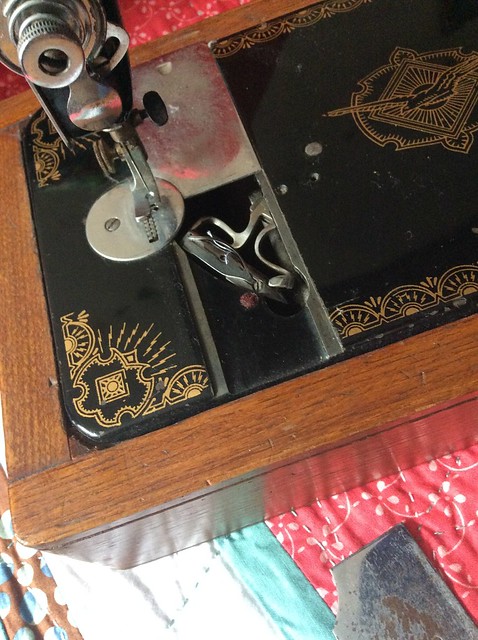
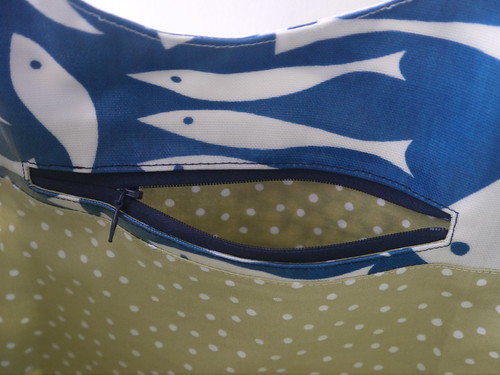
This machine has a 'vibrating' bobbin case; instead of spinning on a fixed horizontal spindle like in a modern machine, this bobbin, in it's shuttle-shaped case, moves backwards and forwards to take the bobbin thread through the loop of the top thread.  According to Wikipedia, this vibrating system was replaced with the modern rotary bobbins because they allow the machine to run faster, with less vibration - although I must say that my very solid Singer machine vibrates a whole lot less than my modern, plastic, electric motor machine!

IMG_1044

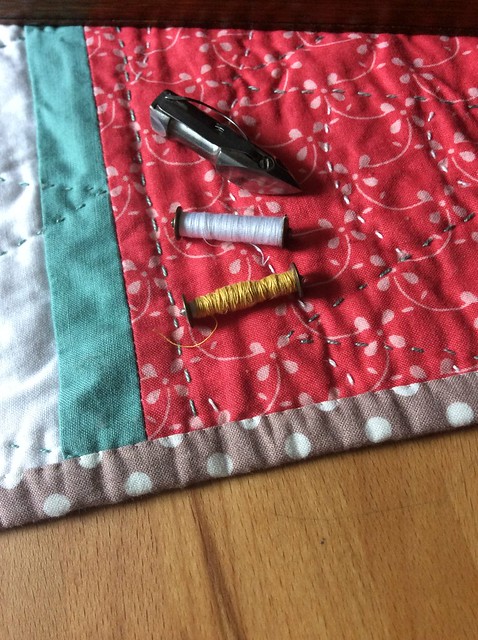
So, as I would really like to complete a whole project on this machine, I am having a think about what might be possible.  It doesn't do zig-zag (and possibly not backwards either), but stitch length and tension are adjustable.  Straight seams are obviously easier than curved, as you only have one hand to steer the fabric with (yes, the other is your motor).  Suggestions are welcome!

IMG_1037

Vicky xx

Sunday, 19 February 2017

Waxed cotton tote

Here's a bag I've been meaning to make for a long time (two years?) - a tote bag in waxed cotton, with leather handles:

P1150668

I bought the waxed cotton so long ago I can't remember where it was from (!) but I think it's pretty easy to find these days.  The leather I bought as one long, inch-wide strip (from eBay I think), and the rivets are sturdy screw-threaded ones.

P1150667

I made this bag wide enough, and with box corners, so that I can fit a pair of flat shoes in the bottom.  In January I did a lot of travelling for work, using trains and taxis to get to client meetings, and found myself changing my shoes a lot.   For the Underground I needed my sensible flat mary-janes, but they're too scruffy to wear straight into 'proper' meetings - so I would stop in reception and stuff them in my bag, swapping for smart heels!  Then in the taxi back to the station I'd change back into the comfy shoes!

P1150675

Inside this bag I tried hard to stick to a plain lining, but a tiny piece of spotted cotton sneaked in. The rest is Kona sage and kale.
Each strap end is attached with two rivets, which have to also pass through a second piece of leather due to their length.  This also makes the attachment stronger, since it's very unlikely that the rivet head will pull through the leather from either side - leather doesn't "give" much, whereas fabric does.  I had to make holes in the leather with a variety of large needles and scissor blades, as I didn't have a leather punch at the time.  I do now, and it's a lot easier! Buy one.

P1150660

It's hard to see in this photo, but I also put a small ticket-size pocket on the outside of the bag.  This is to save scrabbling in pockets etc when you quickly need your train or bus ticket.  I've already used this bag loads, it's my current favourite!

P1150668

Vicky xx

Wednesday, 30 November 2016

Another vinyl shopping bag

Using the same pattern I drafted for this bag, I made one for my sister as a birthday present.  It was lucky I knew from the start that this one wasn't for me, or I would have had a hard time giving it away!  Fortunately there was a bit of vinyl left over so I can make something for myself too.

P1150326

She requested a navy lining and navy handles, which go really well with the vinyl (which is from John Lewis).  Inside is the usual zipped pocket for your phone, chocolate (!) etc.

P1150333

These bags are the perfect size for your swimming kit, or a trip to the shops, or your packed lunch and a book to read at the park...whatever you want!

P1150337

I fancy trying one in dark waxed cotton (I have some brown), with leather handles and a really, really bright lining - maybe patchwork!

P1150339

With the leftover vinyl I'm planning to make myself another zippy pouch (or two!).
Vicky xx

Sunday, 19 June 2016

Pegs, pegged

This is something I've been meaning to make for about a year - a new peg bag for the washing line.

P1130069

I wanted one that was much easier to get the pegs out of than my current "traditional" style bag - there are gazillions of peg bag tutorials out there though, so it didn't take long to track down a bag I liked.

P1130070

This is the tutorial I used, from Sew Mama Sew.

At the back there's a buttoned tab to let the bag be hung on the line, but because I added wire to the top hem of mine it will also stand up by itself on a nearby table or seat.  The wire is stiff, stainless steel garden wire; I threaded it through the top seam and folded the ends back.

P1130067

I've had to wait to try it out, as our washing machine developed a terminal fault! Now we have a new one, and some good drying weather coming later this week.

P1130076


Hope you are enjoying some sunny weather too! Vicky xx

Friday, 20 May 2016

Spool birds

I'm a bit late to this party, but better late than never.  The spool bird pattern has apparently been all over the internet for ages; well I only just discovered it, and I love it!  You can find the pattern here, but this is only one place you can download it from.


It's a very straightforward gusset pattern - cut out the two shapes (the body on a fold), stitch together (three seams), stuff and sew the tail closed.  I glued on eyes too, and quilted the tails.

P1120694

I made lots of different colour birds and as soon as Kitty spotted them she informed me that she needed some for her room.  So here they are, perched on a twig I picked up outside

P1120681

and here are all the others, looking a very bright and cheerful flock!  Most of them are brightening up my desk now.

P1120069

This picture shows off their lovely tails...

P1120691

Back soon with more sewing (or possibly knitting, as I have some socks on the go).
Vicky xx

Thursday, 26 November 2015

Coated cotton tote bag

Back to bags! I've made myself a new swimming bag, with coated cotton (vinyl cotton) from John Lewis.  I got this fabric back in March, but kept putting off cutting it up in case the bag didn't turn out how I imagined it.

P1110806

However, all is well and I'm really pleased with this bag!  Inside there is a zipped pocket - tricky to do in the vinyl, so I used strips of Bondaweb to hold the opening quite flat while I stitched in the zip.  You can see my zipped pocket tutorial here.

P1110801

In the picture above you can also see there's a vinyl facing above the cotton lining.  I'm hoping that will stop the bag soaking up too much water when I grab it from the locker with wet hands!

P1110797

Somehow the bag looks smaller in these pictures than in real life. There's plenty of room for a big towel and all the other bits you need when you go swimming, but the bag is not too enormous to carry over your shoulder.  I need to write up how I made this one (before I forgot) so I can whip up some Christmas presents!

Vicky x

Tuesday, 3 November 2015

Second trail tote

Following my birdy trail tote, here's one with a leather flower - a commission in orange spotty linen.  The pattern is by Noodlehead (and it's free! here)

P1110456

This one's the same size as my blue birdy one (that's medium, which isn't in the pattern).  It has grey piping, and a grey strap, and leather details - an applique flower and tabs for the magnetic snap.

Inside, the lining is an Ikea furnishing fabric.

P1110454

As before I used the suede-y back of the leather for the flower.  I tried to machine stitch it on but got lots of skipped stitches, so went back to hand sewing - need to work on this as machine stitching would be so much quicker.


The recipient was very pleased with her bag, so a success all round.  I've made lots of things lately that haven't got blogged, so there will be more posts very soon!

Vicky xx

Saturday, 26 September 2015

Sew Together bags numbers 2 and 3

This pattern turned out to be a good investment!

After I made my daughter a ST bag for her birthday in pink and purple (#2)....

P1110434

Her cousin asked for one with green in it, for back to school this September (#3)...

P1110340

For the exterior I used Essex Linen in charcoal (I prefer the black though), and inside a variety of blues and greens, with grey zips

P1110344

My favourite is the turquoise leopard print!

P1110339


P1110338

Apparently there's a fourth one of these bags to be made now, for Thomas! Well, it is his birthday in November so I reckon I can get that made in time.

P1110438

Check back soon for ST#4!

Vicky xx

Sunday, 26 July 2015

Trail tote

Yesterday I finished making a bag using Noodlehead's Trail Tote pattern (this pattern is free - download it here).  The download has small and large sizes - so I made my own medium size.


 This bag was nearly finished a week ago, until I decided what it really needed was a bird on the front, and the bird was going to be leather.  Don't ask me where that came from!  I bought a bag of leather scraps and did some experimental sewing.


I hand-stitched the bird on, but next time I think I would machine sew (as long as the leather wasn't too thick) as it's hard to get the stitches neat by hand.  I used the reverse, suede-like side of the leather for this.


Once the bird was done, I thought a finishing touch with a bit more leather was in order.  I chose a slightly thicker scrap from the bag and cut two strips to fold over the top edge, where the magnetic catch goes.  Although these look like they're stitched on, they're glued.  I stitched around the edges (by machine), then put the magnetic snap through the leather and through the complete thickness of the bag.  Then I glued each tab down on the outside.


I highly recommend this pattern (and Noodlehead in general!).  My fabric was thick cotton, with thick interfacing.  The lining is quilting cotton.


Happy summer! x

Related Posts Plugin for WordPress, Blogger...