Sunday, 18 August 2013

Zip pouch with mermaids

Here's a cute little pouch I made for my daughter, she loves it!  The pattern is from Noodlehead's tutorial for a wide-mouth pouch and it really works - when the zip's open you can see right in. I've used it before and I highly recommend it.

P1030781

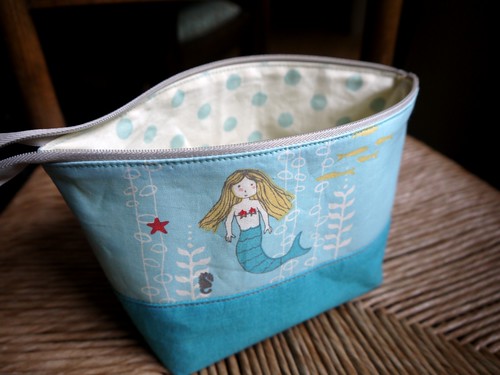
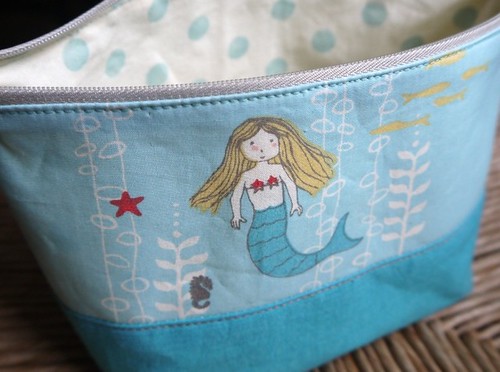
 The fabric I've used here is some I dug out of a pile I bought ages ago - the beautiful mermaids are an organic print from Birch fabrics, and the solid blue is a Kaffe Fassett (no idea what the colour's called) that matches the mermaid's tail exactly.

  P1030782

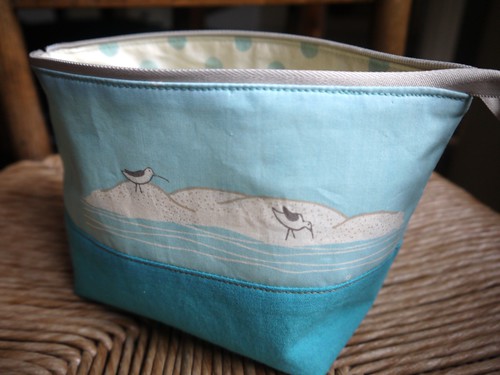
On the back I've used another part of the print, with some wading birds feeding on a sand bar. I really, really like this fabric - it's quirky but reflects nature (...cos do mermaids exist or not? What do you think?).

P1030788

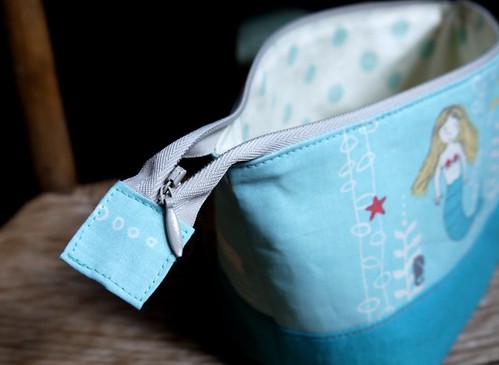
I've used an invisible zip here, but not sewn it in "invisibly". I just like the neat look when it's closed, and the little tiny zip pull.  If you don't know Noodlehead's blog, do have a look (Noodlehead), she has a great selection of tutorials with clear instructions.  If you try this pouch, make sure you buy a plenty long enough zip for the size you're making, as it makes all the difference being able to pull the zip right past the end of the pouch.

P1030781b Bye for now x

Tuesday, 9 July 2013

Not orange peel - ready to quilt!

My quilt in progress, which I called Not Orange Peel in this post, is finally ready to quilt.  I think I started this one in mid-February, since when progress has been slow as I mused about how to join everything together, which way to press the seams, how big to make it, etc.

P1030159

A few weeks ago I finished joining all my leaf blocks together after looking at them pinned to the wall for months on end, and then further delay trying to find the right colour for the stems (not to mention then starting to put the stems in, and deciding they needed pointy tops instead of flat tops....).  The random-ness of the stem lengths was important - at first I thought I could put in five full-length stems, but that didn't work; the quilt top needed to be broken up by having shorter stems so that the leaves, rather than the stems, were the main feature (thanks to my husband Mike for this inspiration!). Here's how it looked half-way through piecing, when I was starting to think about the stems:


So now it's basted and ready to go. Quilting will be by machine, in a sort-of tree-like pattern that flows from a bottom corner towards the top, spreading out as it goes. I'll be doing that on my little Elna machine, with a walking foot and a washable marker!


Monday, 8 July 2013

Next quilt on my list...

...is this beauty from Julie at Jaybird Quilts.


I'm a scientist when I'm not quilting and I love that this quilt combines both. Those hexagons could be just hexagons - one of the oldest patchwork shapes we know - or they could be any number of things in the world of science: how about benzene rings, phenolic groups, bee honeycomb, crystals, part of a DNA helix, a constellation....any suggestions?!

At the moment I can't decide if I like the white background or the grey. My sister has requested one in grey, so maybe I'll start with that and see whether to repeat it for myself or go white! But first, of course, there are other projects to tidy up. . .

(PS I asked Julie if I could post this photo with a link but I haven't heard back from her in the five weeks since I asked, so I'm cautiously going ahead with this post!)

Sunday, 16 June 2013

My Snawheid mittens

Back in March I posted about the Snawheid hat I knitted using Kate Davies' pattern. Here I've taken it one step further!

P1030076

The hat turned out so well I was inspired to make mittens to go with it, and I started one almost straight away. 

P1020087

That was finished by Easter, but then I knitted another mitten (different yarn, different pattern) before I got round to ordering more of the Jamieson & Smith yarn for the second Snawheid mitten - so there has been a slight delay in getting the pair of these ready to wear. But now here they are, after a week's holiday on Tiree (Scottish Western Isles) I've had time to finish that second one off (and the weather is still just about chilly enough to wear them!).

P1030072


The colourwork makes these very cosy and snug, and after a gentle wash the yarn has come up feeling lovely and soft and full. As I mentioned in my previous post, I mashed up Kate's snowflake motif with the Lusekofte-sque mittens pattern from Ravelry and am really happy with the result!  I put rows of three and four snowflakes on the back of the mittens and left the palms plain.  From the Lusekofte-sque pattern, apart from the shape, I borrowed the border pattern.
The mitten pattern has a double thickness cuff at the top and bottom which I love, and I think it might translate onto socks quite nicely...

I did make these slightly bigger than the Lusekofte-sque pattern, adding an extra ten stitches to the width (I think!) and ten rows to the length, as well as an additional two stitches to the thumb and two extra rows (but I do seem to have fairly big hands).

The weather hasn't been too chilly lately so I'm hoping not to need these till winter starts. In the meantime, the garden's looking lovely....

P1030037

P1030047

Wednesday, 29 May 2013

The Tiree pebble

We're on holiday! Last Saturday we caught a really early ferry out of Oban to the tiny island of Tiree, right on the western edge of the Scottish Hebrides. 

P1020784

There's not much here, but there's beautiful beaches with beautiful pebbles and there's sheep's wool on the fences and beaches (I brought some fleece with me too, just in case). (If you're new to felted stones, see my original post for how I got inspired to make these).

P1020843

This white wool was from a beach at Hynish, in the south of the island.  I've no idea what breed of sheep this is from! I washed it with hand-soap to remove the lanolin and as much of the dirt as I could and teased it out, then let it dry.  Once it was dry I teased it out a bit more, then made it into a layer I could wrap round a pebble.  It wasn't as easy as using the combed fleece, because in that all the fibres lie in the same direction and it's easier to wrap it snugly round the pebble.  However, I managed, and felted it as usual - the wool did go very baggy during the felting but eventually formed a good and fairly even layer.  (Also in the picture above are too small pebbles ready to be felted with wool from Weardale - I like their little explosive haircuts!).

P1020809

This white wool has definitely formed felt, but it remains quite fuzzy.  My best felting action cannot seem to get these surface fibres to knit in! I noticed the same thing when I used white fleece from my previous felt kit; other wool types seem to make denser, closer felt - but this has its own character.

P1020908

So here is a memento of our holiday - a pebble from Tiree, felted in wool from Tiree! And, in this picture, picture nestling in a lovely new dish from Tyrii pottery.

Hoping your weather is as lovely as ours up here x

Thursday, 23 May 2013

The Graham quilt

Chances are, you won't have heard of the Graham quilt.  It now belongs to Killhope Lead Mining Museum (have I mentioned them before?!), but its story starts about 150 years ago in nearby Allendale.  And in between Allendale and Killhope, which are about a mile apart up at the tippety-top of the North Pennines, there's a journey to New York state and back.


Made by Hannah Peart in the early 19th century, the quilt is a traditional design known as a strippy quilt - literally meaning it's made of strips of fabric. This method of quilt-making is very much associated with this area, the North Country (really County Durham and Northumberland). 


The quilt top is made of three or four different prints, in seven strips running the entire length of the quilt.  Some of the fabrics are pretty faded now, which isn't surprising given the age of this quilt, and it's hard to know what the original colours would have looked like - I suspect there may have been quite a lot more red in the stripes that are now orange.


The back is a fairly coarse, creamy colour cotton.  All of the piecing and quilting has been done by hand on this double size  quilt, and the edges are finished by folding them over to the back and stitching down.


In 1854, Hannah emigrated from her home in the North Pennines to join her sweetheart Joseph Graham in New York state, taking the quilt with her.  He had travelled there a few years earlier to seek a better life in farming than he could make in mining in Weardale.  Hannah and Joseph married and spent the rest of their lives in America, writing home regularly to their family still in the North Pennines.  Joseph died in 1905, and Hannah in 1911.


Here's a picture of the quilt back, showing some of the quilting, which includes patterns in parallel lines, scallops and four-petalled flowers (you can see one petal in the picture above, enclosed in a diamond shape).  There are a few holes in the quilt back, but they don't look like moth holes.  In the photo below you can see quilting in scallops following the printed pattern on the fabric.


Amazingly, although Hannah didn't return to the UK, her quilt did.  In the 1980s, her great-grand-daughter brought the quilt, and letters sent to Hannah in America, back to the UK and presented them to the museum.  So this quilt, over 150 years old, is now back where it started and soon it will be on display to the public alongside the letters that Hannah and her family sent back and forth to each other across the sea. It's an amazing story!

Monday, 6 May 2013

Starry night

Today I can finally show you pictures of a quilt I finished more than two months ago - but the weather's been so dull and cloudy it was impossible to get any proper pictures of it! And I wanted the photos of this quilt to do it justice, because I'm very pleased with how it turned out, as is the recipient-to-be, Thomas (aged 8).

P1020536

This quilt features wonky stars made with Kaffe Fasset's shot cottons, with a background of Kona coal, a dense, dark grey.  I started off with a pack of shot cottons in 6-inch squares from Cottonpatch, then bought more of the colours I liked to make some bigger stars and to make the quilt backing.  By request, the back is orange! But actually this really works with the dark quilt top and its bright stars.  Also on the back I was asked to include the moon, which is appliqued.  The binding is in the same grey as the quilt top.

P1020519

P1020503

Here's the back - the orange is softer than it looks here.  As I had to join two pieces together, I put in a row off flying geese while I was at it. 


So finally today the weather was sunny. I photographed the quilt on a stone wall a short way from our house. It's alongside a public footpath so a few people passed as I was taking the pictures, but nobody asked any questions!

I've quilted this with a mix of hand and machine stitching. I stitched radiant lines by hand on the stars in a  colour to match each star, and went round each one in pale silvery grey.  Between the stars I used my machine to quilt "swooshes", as if these were shooting stars, using dark grey as a top thread and orange in the bobbin so that this machine quilting is more texture than pattern.

P1020515

I'm so happy with this one, and so is Thomas. The only problem is he's having to wait before he can use it until I've finished Kitty's quilt! And that's another story you can read here..

Please leave me a comment and let me know what you think of this quilt - I'd like to know!
- Vicky x
Related Posts Plugin for WordPress, Blogger...