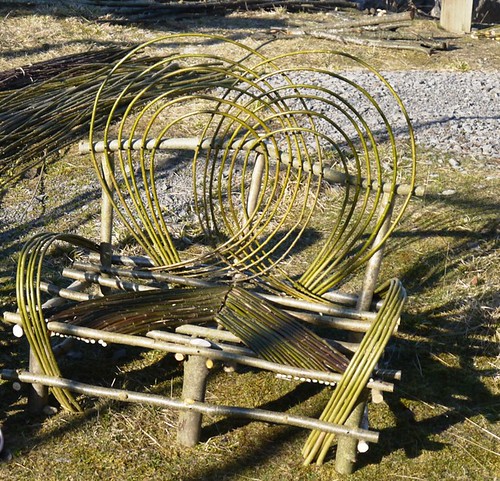
This Saturday Mike and I have been busy sawing and chopping, making a new seat for the garden. We spent the day at Harehope Quarry, being taught (some of) the art of rustic furniture making by Rachel Benson of Old Sleningford Farm.
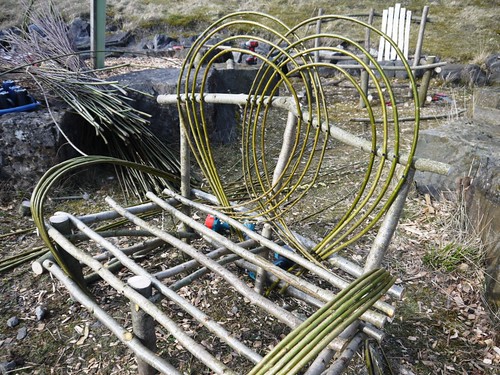
Quite different from sewing quilts and bags, but such a brilliant day! The weather was amazingly cold and amazingly sunny - although it's spring here in the UK, we haven't yet had any warm days! In this photo the seat is almost finished - we added more willow to the seats afterwards, and another arch to the back. We're calling it the 'Pixie Love Seat' - it's small but perfectly formed, and I think the shape on the back resembles a heart. Ahhh.
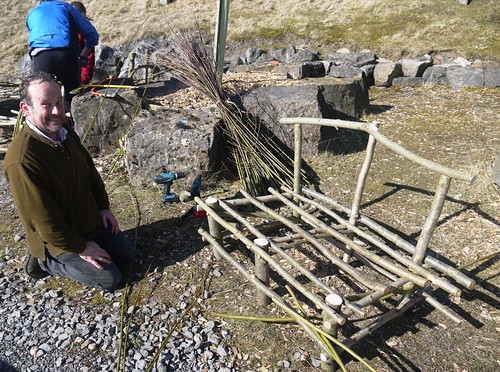
We started off making two frames with hazel logs for the legs at each side, then joining these with horizontal pieces front and back to make a rectangle. Here's Thomas busy with the drill:
Next we added horizontal seat pieces, and a back frame...
And then it was time to add curving willow sticks to give the frame some character. Here are the arms in place, and the first pieces going on the back:
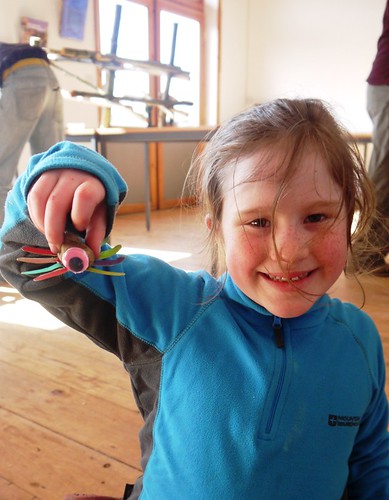
In the meantime Kitty was very busy making a little Stone Bug!
So when the warmer weather comes (!) we'll be ready to enjoy a cup of tea in the garden, on our Pixie Love Seat. And just imagine how beautiful it's going to look with a quilt on it...:)
Pages
Search This Blog
Sunday, 23 March 2014
Friday, 14 March 2014
Simple zipped inner pocket tutorial
For ages I made bags with inner pockets that were just patches - a rectangle of fabric sewn onto the lining, sometimes with a popper to keep it closed. Then recently I discovered it's really pretty easy to make a hidden, zipped pocket! So I've written this tutorial to show you how to make a hidden zipped pocket - it's pretty straightforward, there are just eight steps.
You'll need to have your bag lining pieces ready to go (i.e. cut to size and shape), but preferably not sewn together yet, and definitely not sewn into the bag. If you're worried about how this pocket process might work out, I recommend trying it on some scrap fabric. You can always take the zip out when your practice version is done and use it again, especially if you set your stitch length to something quite long to make unpicking easier!
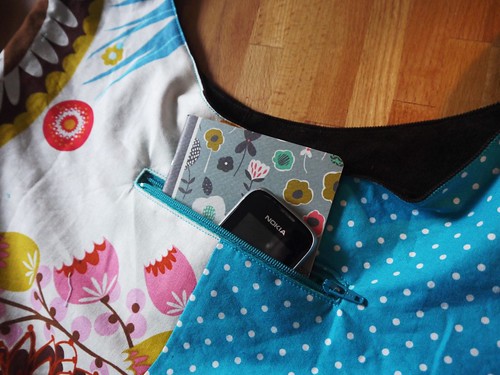
Here's a couple I've made recently...
So if you'd like to add a neat, useful pocket to your next bag, read on!
1) What you need. You'll need a zip, and two pieces of fabric each about 12x14cm (but the size is entirely up to you!). Your zip needs to be at least 15cm long for a pocket big enough for something like a mobile phone or small notebook to fit in the pocket.
I've successfully used short zips I've "harvested" from old trousers and skirts that I'm upcycling (if you do this, just watch that you don't zip the zip pull off the end of the zip once it's out of the seam, as they don't always have a stop).
2) Mark pocket zip position. First you need to make a long, narrow 'window' in the bag's lining, with one of your pocket pieces attached behind. To do this, mark a line on the right side of your bag lining where you want the pocket zip to end up. Make it 2cm or more SHORTER than your zip. I recommend using a washable marker or chalk here. Note that in the photos for this tutorial my bag lining is already sewn along the top of my bag exterior, but is still open at the bottom so I can access the wrong side of it. Also, it's made of two different fabrics (a floral and a polka dot).
Transfer the line to the wrong side of the lining, and draw a box around it, on that wrong side, 1cm wide and 0.5cm longer at each end; this will be your stitching line. (In the picture below, the box is marked on the right side of my lining, but you do also need it on the wrong side).
3) Place first pocket piece. Flip the lining right side up. Lay one pocket piece, with right sides together, on the right side of the bag lining. Have the top edge of this piece only 2cm above the line you drew. Pin in place around the edges. This photo shows the pocket piece being laid over the marked line and box:
4) Sew first pocket piece. Flip again, so lining is wrong side up and you can see the box you drew. Now sew around the box, keeping it as neat, straight and square as possible. I've sewn in red thread here so you can see exactly what's going on:
5) Cut the pocket opening. CUT (!!) neatly along the line in the centre, through both the bag lining and the pocket piece, extending the cut diagonally into the corners. Make very sure not to cut anything else that might be flapping around underneath your lining!
Here's the completed long cut and diagonal snips, from the other side:
6) Press your seam. Push the pocket piece through the cut, laying it flat on the wrong side of the bag lining. Press the seam into a neat fold, to leave a narrow window - this opening will hold your zip.
7) Sew zip into the opening. With the right side of the bag lining facing you, pin the zip in place behind the opening and baste into place, keeping the pressed edges 1cm apart along the whole length of the opening. Make sure the zip pull is visible within the opening!
Fit a zipper foot to your machine.Using small stitches and stitching slowly, sew all the way around the opening, being particularly careful to stitch straight (and not to break the needle!) at each end where you have to sew across the zip teeth. You may need to move the zip pull out of the way as you sew along the length of the zip.
If necessary, trim zip ends so there is no more than 2cm beyond the stitching at either end. Now you have a zipped opening in your bag lining, but behind it there's no pocket! We'll put that right next.
8) Attach second pocket piece. The last step is to attach the other pocket piece. With right sides together pin the second pocket piece to the one already attached to the bag lining.
Making sure not to catch the actual bag lining in the seam, stitch around all four sides of the pocket pieces with 1cm seam allowance. It's worth double-stitching the bottom pocket seam now, as getting in there to repair it once the bag is finished will be tricky.
8) Finished! You now have a hidden, zipped pocket in your bag lining! Finish your bag lining as per your pattern, and sew into your bag. Enjoy zipping and unzipping your pocket!
Thursday, 13 March 2014
A hot mat for the kitchen
For a quick, quilty fix, I made a new mat for the kitchen last week.
This fish was inspired by the lovely drawings on Syko's blog. (And by the way, the long gap since my last post is due to all my spare time being spent working on a quilt which will hopefully appear in a magazine later this year!)
I pieced together some scraps of leftover quilt batting for this mat, enough to make two layers. Then I sewed the fish onto a piece of linen layered onto one piece of batting, and quilted the backing fabric onto the second piece.
After, I cut both to the same size and sewed them right sides together. To finish, turn right side out, stitch opening closed, and topstitch. One mat, ready for a hot pan or dish in the kitchen - and washable!
These look like they would make good little presents - Mother's Day is coming up, and I have friends moving into a new house they're building soon, so I think I'll be making more.
P.S. If you use Instagram, I'm now on there - frosterleybazaar.
Subscribe to:
Posts (Atom)