Showing posts with label Embroidery. Show all posts

Wednesday, 26 November 2014

Tu-whit tu-whoo!

How about this bag with an owl looking after the front?

P1060403.JPG

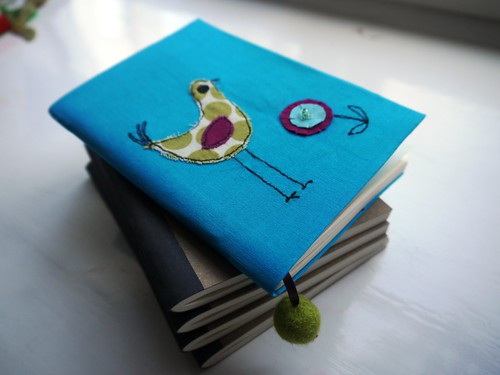
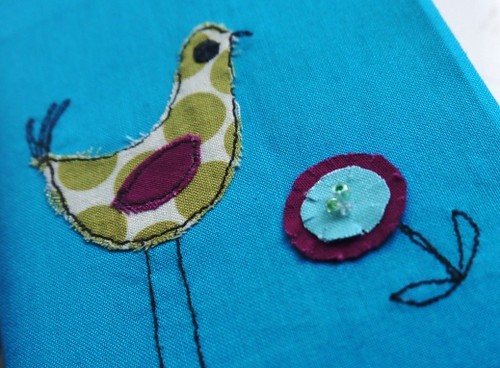
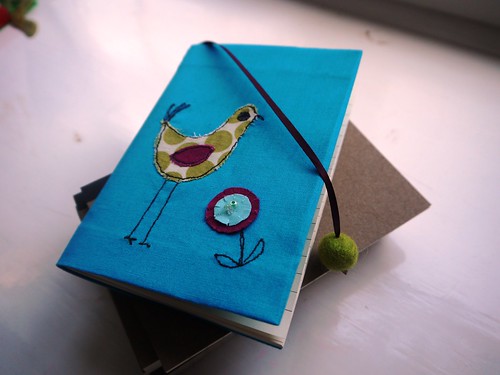
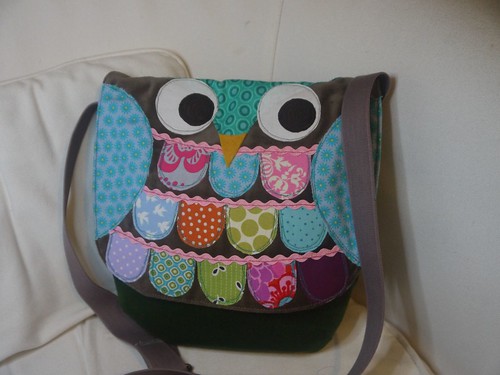
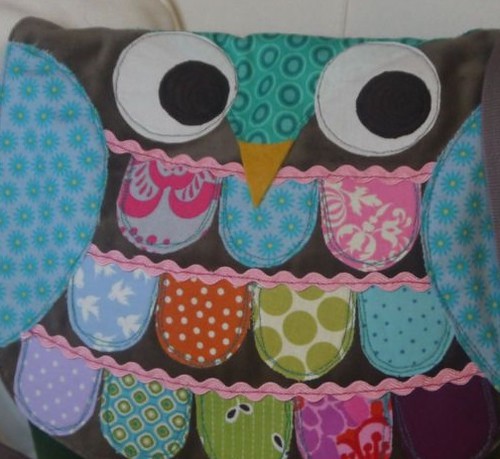
I sewed this one up just before I was taking my bags and purses to a Christmas sale, using Noodlehead's (free!!) trail tote pattern for Robert Kaufman.  I'd had the idea of a bag with an owl on the front flap for ages, then I saw this round-based bag pattern and thought it would work really well.

P1060408.JPG

Of course, the Noodlehead pattern doesn't have a front flap, so I made my own pattern piece for that.  I also missed out the piping as I was working with velvet and fleecy interlining, so had enough bulk to contend with already! When I make the pattern with lighter weight fabric, I'll definitely use piping because it gives such a lovely finish.

P1060407.JPG

I also did something different to sew my strap on than the pattern says.  I find it easier to stitch the strap to the outside seams of a bag, before the lining goes in - that way, there are fewer layers to get the machine to stitch through when you go around the top edge.  Also, when you open the bag the strap then falls away from the opening.

owl

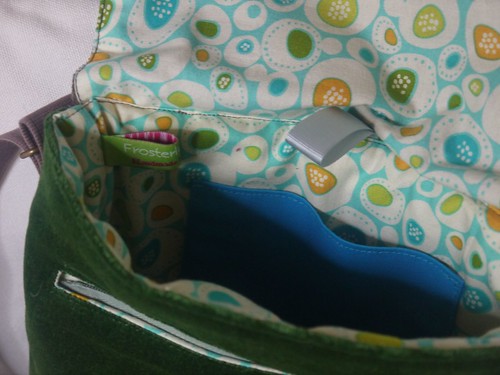
Finally, instead of using a magnetic snap to close the bag (I didn't have one handy), I added a small ribbon loop in the back seam with a big popper on.  That means the bag can be closed without the owl on the lid being pulled out of shape - it can just hang around being an owl!

Sunday, 25 May 2014

Second kitchen mat

I love my fish kitchen mat so much, I made another one this time with a bird on. The bird motif came from an IKEA print that I love - hoping IKEA won't mind me hacking this!

P1050155

As I didn't have thick red machine thread to make the outline of the bird, I used my sashiko thread and needle to make the outline in running stitch. Then I used fusible web and machine applique/embroidery to add the neck stripe, eye, spots and legs.

P1050153

The front is some pale grey linen, and the back is Kona aqua. Inside are two layers of natural batting, with heavy quilting onto the back fabric.

P1050152

And I'm so excited that my runner beans are growing (and the slugs haven't got to feast on them yet!!) that I'm sticking a picture of them in too!

P1050158

Thursday, 13 March 2014

A hot mat for the kitchen

For a quick, quilty fix, I made a new mat for the kitchen last week.


This fish was inspired by the lovely drawings on Syko's blog.  (And by the way, the long gap since my last post is due to all my spare time being spent working on a quilt which will hopefully appear in a magazine later this year!)


I pieced together some scraps of leftover quilt batting for this mat, enough to make two layers. Then I sewed the fish onto a piece of linen layered onto one piece of batting, and quilted the backing fabric onto the second piece.


After, I cut both to the same size and sewed them right sides together. To finish, turn right side out, stitch opening closed, and topstitch. One mat, ready for a hot pan or dish in the kitchen - and washable!


These look like they would make good little presents - Mother's Day is coming up, and I have friends moving into a new house they're building soon, so I think I'll be making more.

P.S. If you use Instagram, I'm now on there - frosterleybazaar.

Friday, 3 January 2014

Happy 2014!

Wishing you lots of luck for 2014!

Just before Christmas I finished a present for some friends who adopted a baby girl in December.


 This is an applique made with machine embroidery, a small picture to frame for the wall. I sewed onto ordinary white quilting fabric which I starched multiple times to make it stiff. Another way would be to use fusible stiffener such as Vilene, but I didn't have any nearby.


(Apologies for the dark-ish photos, it's midwinter!)
Each piece of coloured fabric was stuck down with Bondaweb and sewn into place, then beads and buttons added last.


I was really happy with how this looked when I'd finished, and the new parents were delighted with it too. I'm planning ways to adapt the design for different occasions, so there may be a bespoke option available in my Etsy shop soon.

What's your first sewing project of 2014?

Friday, 20 December 2013

Velvety velvet

I love velvet - smooth one way, slightly rough the other way; soft, elegant and lovely. That said, it can be tricky to sew because the 'nap' means when the pieces are right sides together they want to move in opposite directions. Velvet is not a slidey fabric!

This week I've been busy making more velvet purses. I designed the pattern and applique for these over a year ago, but still have lots of un-used purse frames. These might make last-minute Christmas presents, and some are going into my Etsy shop. As well as for coins, I think these would make a lovely jewellery case - for a necklace, bracelet or rings, for example.


The machine embroidery on these is done with the feed dogs down, so I can trace around these flower petals by moving the fabric in any direction under the needle. It takes a bit of getting used to, but for designs like this it's essential - this would be so difficult to sew using straight stitching!


In the centre of this flower (and the one on the blue purse) I've added a small shell button and tiny seed beads, by hand. All of this embellishment is done before I stitch the two pieces of velvet together to make the purse outer.


Once the lining is made I press the seams, place the lining inside the outer, press the top edges inwards and oversew them together. Then it's time to glue the purse into its frame, which takes a bit of patience! I like to glue the front in first, because it's usually slightly easier to get a neat and tidy glue-free finish on the first side you do. And if there's going to be glue on the velvet, I'd rather it was on the back (although you can remove tiny bits with nail polish remover).

If you like these, please do look in the shop!

Saturday, 28 September 2013

Birdy book

Had an hour or two spare today, so I had a play with machine embroidery. I've made notebook covers before, but only with patchwork, but I see more covers with pictures coming soon!

P1040092

I make my covers using pretty much the same method as Rachel at Stitched In Colour - a link to her tutorial is here.

The colours in these photos aren't great (summer's over!) - this blue cover is a deep turquoise, and the bird's wing deep pinky-purple. These notebooks are about A5 size. I've added a ribbon bookmark with a felt ball on the end. In fact seeing the bag of felt balls, which I've had for months but haven't got round to using (but they're lovely to play with - get yours from Blooming Felt), inspired me back into notebook-covering.

P1040094

Next time I'm going to use Bondaweb to make sure there's not so much fraying on the bird shape - this time I used my standby Pritt stick. Well, it works!

P1040096

Watch this space for more notebooks soon x

Monday, 6 May 2013

Have you ever seen anything like these?

Felted stones - they're all the rage in our house right now!

A few days ago I came across this blog by Lisa Jordan and these stones encased in beautiful hand-made, embroidered felt.  I fell in love! Lisa makes these using combed fleece fibres and the traditional felt-making technique of soap, water and agitation.  There's a tutorial on her blog.


Felted stones by Lisa Jordan of  Lil Fish Studios


Last October a friend gave me a felt-making kit (from Ellie Langley of Fleece With Altitude at Slackhouse Farm) which I've been meaning to get stuck into. Well within 24 hours of seeing the stones, I'd got one of my own!

I nipped out to the porch and rummaged through the box of seaside stuff we dragged back from Colonsay last year till I found a suitable stone, and followed Lisa's instructions.  Didn't take long, with soap, rubbing and hot water, to turn fleece into felt.  Previously I had entertained tame ideas of making flat felt to cut into Christmas decorations or something, but this is so much more exciting - I haven't felt (ha! geddit?) this excited about a new project for a long time!

Once my new stone, soft but satisfyingly heavy, was dry, I tried out some half-forgotten embroidery on it.  And this weekend the kids got excited about covering stones in felt, so we have a growing collection....

A week on, I've made four felted stones in four different types of fleece:

P1020655


Clockwise from top left, these are felted in Wensleydale, Jacob, Sheltand and Blue Faced Leicester wool. I absolutely love them, and there will be many more. Right now I love the natural colours of these undyed wools, but I might do some coloured ones soon.

P1020661


This white one, with bullion knots and running stitch, reminds me of a sea urchin.  The felt remained quite fuzzy and loose, the fibres didn't want to knit together any more than this. The pale grey Shetland wool on the other hand formed a very even, dense felt very quickly - and you could see that it was going to even before I got it wet as the fibres were short and very fuzzy whereas the white Wensleydale was sleek and long-fibred.

P1020659


Keep watching for more felted stones here soon...

Wednesday, 1 May 2013

Tutorial: marking out a sashiko grid


If you haven't done sashiko before, here's how I set out the grid on the fabric.
You'll need your fabric, a white dressmaking pencil, and a ruler (preferably a grid ruler, although an ordinary one would do if you don't already have a grid).

For the sashiko bag I used a 1" square grid, with 2" and 1.5" circle templates.
For the sashiko cushion I used rectangular grid - 3/4" horizontal spacing, 3/8" vertical spacing.

P1020171

1. Wash and damp-press your fabric.  Fabric with a medium weight, such as linen, seems to work best - avoid anything too light, such as quilting-weight cotton.

2. Once the fabric is really flat, cut the piece you'll work on - make it a couple of inches bigger all round than you want the final size to be, to allow for a bit of fraying and the final trimming.  I would recommend starting with a fairly small project, maybe a 6" square sampler. Lay the fabric on a hard, flat surface (cutting mat is good).

3. Sharpen a white dressmakers pencil.  Use it to draw a straight line about two inches from the bottom edge of your fabric; this is your baseline.  Keep the pencil really sharp the whole time you are marking out your grid so that all your lines are fine.

4. Working upwards from each end of the baseline, make marks at 1" intervals (square grid) or 3/8" (rectangle grid).  Avoid parallax errors by getting your eyes right above the bit of the ruler you're using!  Join these marks to make a series of lines parallel with the baseline.

5. Draw a vertical line about two inches from the left side edge of your fabric, making sure it forms right angles with the horizontal lines you've just completed, and crossing the ends of the horizontal lines.  This is where having a grid ruler really helps, as you can easily make sure all your vertical lines fall at right angles to the horizontal ones.

6. Working to the right, make marks on the baseline and the topmost line at 1" intervals (square grid) or 3/4" intervals (rectangle grid).  Again, be sure these are exactly spaced.  Join the marks (you may need to turn your fabric through 90 degrees) to form your grid.

7. Your grid is done. You'll now need to mark on the pattern you're going to stitch, for example using circle templates or marking diagonals for a hexagon-based design.  I'll try and cover some simple patterns in another tutorial soon!

Thursday, 25 April 2013

Sashiko Part II (cushion)

It's spring! Here in the north of England, spring is very late this year, but finally things are starting to grow.  Here's my rhubarb, unfurling its leaves at last.

P1020473

Where was I?
Sashiko.  Inspired by how many people liked my sashiko drawstring bag, I went bigger with my next project - a cushion cover.  Like the bag, this is also based on a pattern in Susan Briscoe's book, although I did make it to fit a slightly different sized cushion.

P1020442

I used the same navy linen as before (this was from Celtic fusion fabrics), and white, red and dark yellow thread.  To begin with I marked out a grid of rectangles, each 3/4 inch wide and 3/8 inch high. This took ages! I used a white dressmaking pencil and it did tend to rub off, so I had to remark as I worked my way up the cushion.

The patterns are all based on hexagons, which is why they all fit together.  From the bottom they are Tsuno kikko (horned tortoiseshell - the large hexagons), Arare kikko (hailstone or segmented tortoiseshell), Juji kikko (cross tortoiseshell) and Kasane kikko (layered tortoiseshell - the tall hexagons).

P1020449

It was only when I came to make the sashiko into a cushion cover that I thought red piping would finish the whole thing off really well, and luckily I had some red fabric with a linen-y texture that was perfect for the job. I even found piping cord and a navy zip stashed away, so no waiting till I could get to the shops to complete this cushion, which is a birthday present for my mum. It has to go in the post tomorrow, so it was fortunate we had a little bit of sun this evening and I could get these photos in natural light.

P1020469


P1020448

I'm hoping to finish off several other sewing and knitting projects next, so possibly no more sashiko for a while. But having completed the bag and this cushion I have lots more ideas for ways to use these beautiful, ancient patterns on my projects.
(I finally ordered the wool I need to finish off the right hand mitten to match my Snawheid hat, although in the meantime the 2.5mm needles seem to have got involved in another project...)

Back soon x

Thursday, 21 March 2013

Sashiko embroidery

I'm not normally the embroidery type, and I can't remember now what got me interested in this, but I've been trying out a bit of Japanese sewing lately.  I've borrowed a library book by Susan Briscoe which explains how to do it and what you need - I ordered some navy linen, and some sashiko thread and needles from the shop at the Quilt Museum in York, UK, and off I went!  My first project (there may be more if this turns out well) is a small lined bag, with embroidery on both sides.

To start with you need to mark out a really accurate grid on your fabric. I used a sharp white fabric crayon and a quilting ruler. As I was doing a pattern based on circles, I also cut cardboard templates to mark these out with.  On the first side I used a pattern called Blue Ocean Waves - all the patterns have Japanese names but I can't pronounce them, so I'm sticking with the translations.
P1020164
You can see it's a bit wrinkly, even after pressing, but it is the first attempt!  For the other side of the bag I used a pattern called Seven Treasures (and I took more photos this time). Here's the pattern marked out (spot the deliberate mistake) and stitching just begun.

P1020171

The stitching on this pattern is completed in diagonal lines, which seems to help with getting the circles to look really circular. This time I've managed to keep the fabric a lot flatter, and the stitches more even. The thread is used double (no dropped needles!), which makes the stitches look like little grains of rice on the fabric.  So simple, but really effective.

P1020166


With both pieces of Sashiko complete I gave them a good press and made up into a lined bag with some red striped fabric I've had for ages. It seemed to go really nicely with the linen, as the stripes are woven rather than printed - it reminds me of Indian cotton.

To make the bag, I more or less used Jenny's tutorial (http://www.incolororder.com/), but I didn't box the bottom corners as that would spoil the embroidery in this case. Here's my finished bag!

P1020280

P1020299

P1020295

I'm really happy with how this turned out - not perfect, but looks very nice. And so I've already started my next sashiko project, which is a cushion. Different patterns this time, I'll show you when it's done!
Related Posts Plugin for WordPress, Blogger...