Showing posts with label Sashiko. Show all posts

Sunday, 25 May 2014

Second kitchen mat

I love my fish kitchen mat so much, I made another one this time with a bird on. The bird motif came from an IKEA print that I love - hoping IKEA won't mind me hacking this!

P1050155

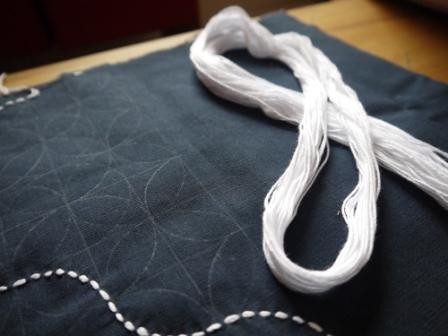
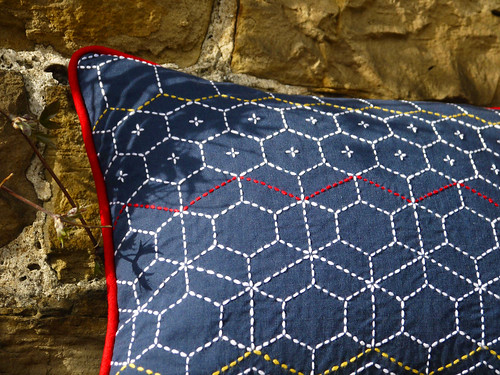
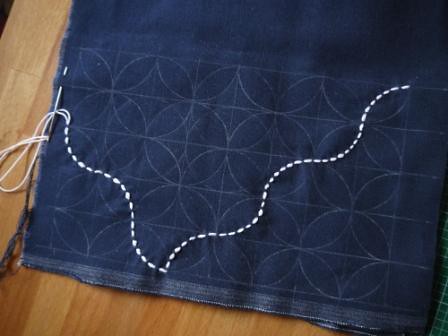
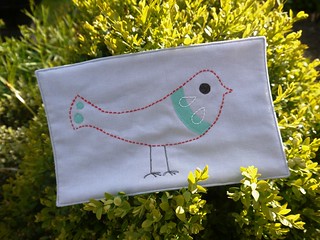
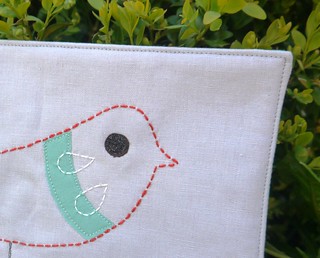
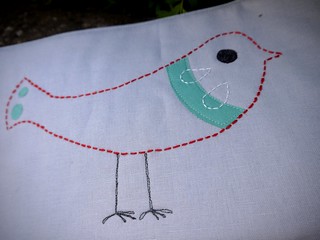
As I didn't have thick red machine thread to make the outline of the bird, I used my sashiko thread and needle to make the outline in running stitch. Then I used fusible web and machine applique/embroidery to add the neck stripe, eye, spots and legs.

P1050153

The front is some pale grey linen, and the back is Kona aqua. Inside are two layers of natural batting, with heavy quilting onto the back fabric.

P1050152

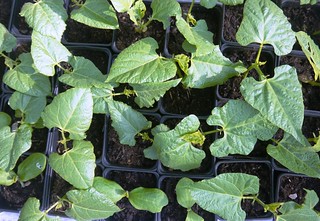
And I'm so excited that my runner beans are growing (and the slugs haven't got to feast on them yet!!) that I'm sticking a picture of them in too!

P1050158

Wednesday, 1 May 2013

Tutorial: marking out a sashiko grid


If you haven't done sashiko before, here's how I set out the grid on the fabric.
You'll need your fabric, a white dressmaking pencil, and a ruler (preferably a grid ruler, although an ordinary one would do if you don't already have a grid).

For the sashiko bag I used a 1" square grid, with 2" and 1.5" circle templates.
For the sashiko cushion I used rectangular grid - 3/4" horizontal spacing, 3/8" vertical spacing.

P1020171

1. Wash and damp-press your fabric.  Fabric with a medium weight, such as linen, seems to work best - avoid anything too light, such as quilting-weight cotton.

2. Once the fabric is really flat, cut the piece you'll work on - make it a couple of inches bigger all round than you want the final size to be, to allow for a bit of fraying and the final trimming.  I would recommend starting with a fairly small project, maybe a 6" square sampler. Lay the fabric on a hard, flat surface (cutting mat is good).

3. Sharpen a white dressmakers pencil.  Use it to draw a straight line about two inches from the bottom edge of your fabric; this is your baseline.  Keep the pencil really sharp the whole time you are marking out your grid so that all your lines are fine.

4. Working upwards from each end of the baseline, make marks at 1" intervals (square grid) or 3/8" (rectangle grid).  Avoid parallax errors by getting your eyes right above the bit of the ruler you're using!  Join these marks to make a series of lines parallel with the baseline.

5. Draw a vertical line about two inches from the left side edge of your fabric, making sure it forms right angles with the horizontal lines you've just completed, and crossing the ends of the horizontal lines.  This is where having a grid ruler really helps, as you can easily make sure all your vertical lines fall at right angles to the horizontal ones.

6. Working to the right, make marks on the baseline and the topmost line at 1" intervals (square grid) or 3/4" intervals (rectangle grid).  Again, be sure these are exactly spaced.  Join the marks (you may need to turn your fabric through 90 degrees) to form your grid.

7. Your grid is done. You'll now need to mark on the pattern you're going to stitch, for example using circle templates or marking diagonals for a hexagon-based design.  I'll try and cover some simple patterns in another tutorial soon!

Thursday, 25 April 2013

Sashiko Part II (cushion)

It's spring! Here in the north of England, spring is very late this year, but finally things are starting to grow.  Here's my rhubarb, unfurling its leaves at last.

P1020473

Where was I?
Sashiko.  Inspired by how many people liked my sashiko drawstring bag, I went bigger with my next project - a cushion cover.  Like the bag, this is also based on a pattern in Susan Briscoe's book, although I did make it to fit a slightly different sized cushion.

P1020442

I used the same navy linen as before (this was from Celtic fusion fabrics), and white, red and dark yellow thread.  To begin with I marked out a grid of rectangles, each 3/4 inch wide and 3/8 inch high. This took ages! I used a white dressmaking pencil and it did tend to rub off, so I had to remark as I worked my way up the cushion.

The patterns are all based on hexagons, which is why they all fit together.  From the bottom they are Tsuno kikko (horned tortoiseshell - the large hexagons), Arare kikko (hailstone or segmented tortoiseshell), Juji kikko (cross tortoiseshell) and Kasane kikko (layered tortoiseshell - the tall hexagons).

P1020449

It was only when I came to make the sashiko into a cushion cover that I thought red piping would finish the whole thing off really well, and luckily I had some red fabric with a linen-y texture that was perfect for the job. I even found piping cord and a navy zip stashed away, so no waiting till I could get to the shops to complete this cushion, which is a birthday present for my mum. It has to go in the post tomorrow, so it was fortunate we had a little bit of sun this evening and I could get these photos in natural light.

P1020469


P1020448

I'm hoping to finish off several other sewing and knitting projects next, so possibly no more sashiko for a while. But having completed the bag and this cushion I have lots more ideas for ways to use these beautiful, ancient patterns on my projects.
(I finally ordered the wool I need to finish off the right hand mitten to match my Snawheid hat, although in the meantime the 2.5mm needles seem to have got involved in another project...)

Back soon x

Thursday, 21 March 2013

Sashiko embroidery

I'm not normally the embroidery type, and I can't remember now what got me interested in this, but I've been trying out a bit of Japanese sewing lately.  I've borrowed a library book by Susan Briscoe which explains how to do it and what you need - I ordered some navy linen, and some sashiko thread and needles from the shop at the Quilt Museum in York, UK, and off I went!  My first project (there may be more if this turns out well) is a small lined bag, with embroidery on both sides.

To start with you need to mark out a really accurate grid on your fabric. I used a sharp white fabric crayon and a quilting ruler. As I was doing a pattern based on circles, I also cut cardboard templates to mark these out with.  On the first side I used a pattern called Blue Ocean Waves - all the patterns have Japanese names but I can't pronounce them, so I'm sticking with the translations.
P1020164
You can see it's a bit wrinkly, even after pressing, but it is the first attempt!  For the other side of the bag I used a pattern called Seven Treasures (and I took more photos this time). Here's the pattern marked out (spot the deliberate mistake) and stitching just begun.

P1020171

The stitching on this pattern is completed in diagonal lines, which seems to help with getting the circles to look really circular. This time I've managed to keep the fabric a lot flatter, and the stitches more even. The thread is used double (no dropped needles!), which makes the stitches look like little grains of rice on the fabric.  So simple, but really effective.

P1020166


With both pieces of Sashiko complete I gave them a good press and made up into a lined bag with some red striped fabric I've had for ages. It seemed to go really nicely with the linen, as the stripes are woven rather than printed - it reminds me of Indian cotton.

To make the bag, I more or less used Jenny's tutorial (http://www.incolororder.com/), but I didn't box the bottom corners as that would spoil the embroidery in this case. Here's my finished bag!

P1020280

P1020299

P1020295

I'm really happy with how this turned out - not perfect, but looks very nice. And so I've already started my next sashiko project, which is a cushion. Different patterns this time, I'll show you when it's done!
Related Posts Plugin for WordPress, Blogger...