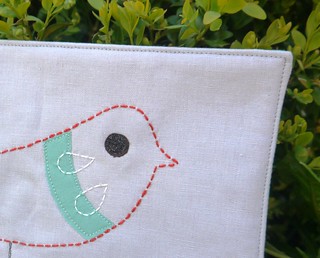
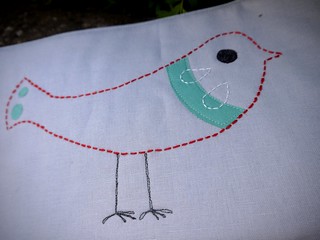
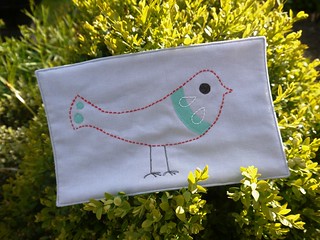
I love my fish kitchen mat so much, I made another one this time with a bird on. The bird motif came from an IKEA print that I love - hoping IKEA won't mind me hacking this!
As I didn't have thick red machine thread to make the outline of the bird, I used my sashiko thread and needle to make the outline in running stitch. Then I used fusible web and machine applique/embroidery to add the neck stripe, eye, spots and legs.
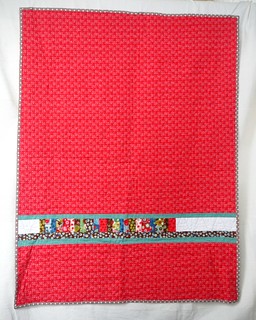
The front is some pale grey linen, and the back is Kona aqua. Inside are two layers of natural batting, with heavy quilting onto the back fabric.
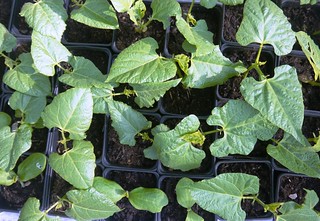
And I'm so excited that my runner beans are growing (and the slugs haven't got to feast on them yet!!) that I'm sticking a picture of them in too!
Pages
Search This Blog
Sunday, 25 May 2014
Friday, 23 May 2014
Sewing a shirt
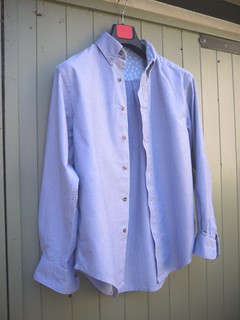
A long time ago, when I was about 18, I used to sew clothes all the time - I was the kind of square who preferred making things to buying them! The only thing that's changed since then is how much free time I have to make those things! So it's been a rare event, these last 20 years, for me to make any clothes (with the exception of my wedding dress and some dressing-up costumes for the kids). However I made another exception last year, and made my husband a shirt, probably inspired by the Great British Sewing Bee and their shirt-making task.
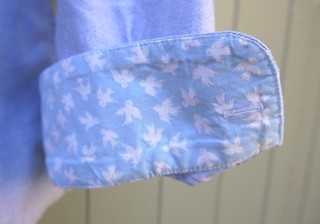
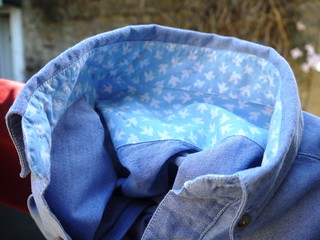
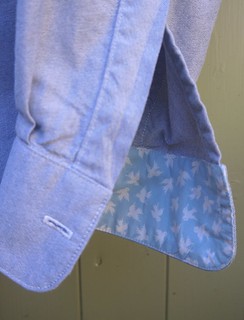
I ordered traditional cotton Oxford weave shirting from Acorn Fabrics, and the husband helped choose the print that would go inside the yoke, collar and cuffs (Hanky Panky in blue).
A man's shirt isn't a difficult thing to sew, if you have plenty of time. Fitting is usually straightforward, especially for a smart/casual shirt - as long as you get the chest size right and the arms the same length, it should fit fine as it's not a close-fitting garment. You can adjust arm and back length if necessary before cutting out the garment, but I don't see any need to make a toile (although if you've never applied a collar and collar band before, it may be worth cutting these out from scrap fabric for a little practice sew).
The pattern I used for this shirt was McCalls 2447. I wanted a pattern with a full back yoke - some very casual shirt patterns leave this out - a collar band, and sleeve plackets (that's the split that let's the cuff open wide). This pattern seems like one that will look great made up in many different fabrics and styles, so I intend to use it again and again.
Mike was very happy with his finished shirt, and it's had quite a few trips out of the wardrobe. The cotton Oxford is a lovely heavy weight, although it does need ironing! I finished all the seams as flat-felled, so there are no raw edges inside, and top-stitched everything to give the shirt a professional finish. Very enjoyable to make, and I love seeing Mike wearing something I've made him!
Wednesday, 21 May 2014
Bloggers Quilt Festival: starry night
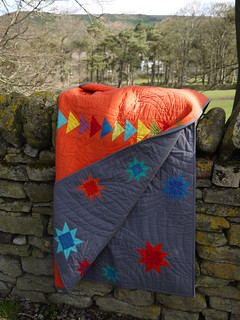
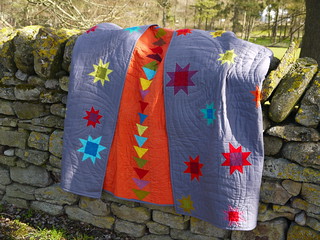
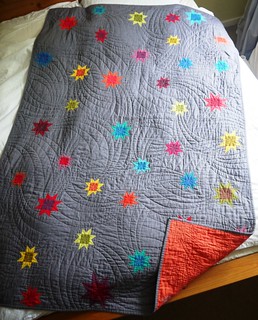
This is my second entry in the Bloggers Quilt Festival, organised by Amy's Creative Side (thanks Amy, love your festival!). I finished this quilt about a year ago, and called it Starry Night because that's what it reminded me of. It's entered in the Modern Quilt category of the festival.
I really wanted to make a quilt for each of my children before they got too old, so they'd be able to grow up with them. This one, for Thomas, started with a pack of charm squares of Kaffe Fassett's shot cottons. The full story of how I decided on stars on a grey background can be found in the original post about the quilt here.
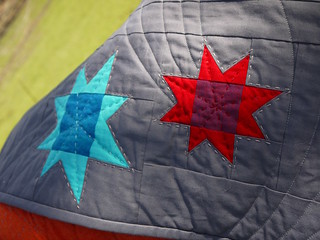
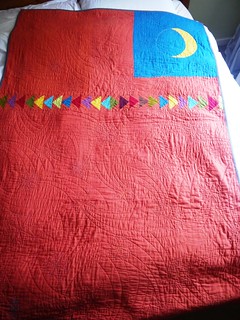
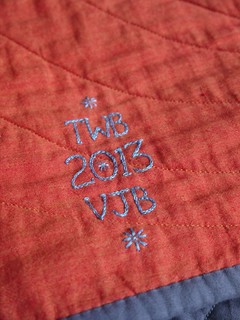
My favourite thing about this quilt is that Thomas asked me to put the moon on the back, because the moon and stars obviously go together! He also asked for orange for the back, which is his favourite colour. To quilt this one, I used a mixture of hand and machine stitching. I hand quilted from the centre to the points of each star, and around each one in silver, all in DMC perle cotton. Then between the stars I added shooting star "swooshes" by machine.
Unfortunately I don't have a picture of the whole quilt at the moment but I'll try and get one in before the end of the festival! I now have some pictures of the whole quilt! Enjoy!
Starry night quilt
Category: Modern quilts
Machine pieced
Hand and machine quilted
I really wanted to make a quilt for each of my children before they got too old, so they'd be able to grow up with them. This one, for Thomas, started with a pack of charm squares of Kaffe Fassett's shot cottons. The full story of how I decided on stars on a grey background can be found in the original post about the quilt here.
My favourite thing about this quilt is that Thomas asked me to put the moon on the back, because the moon and stars obviously go together! He also asked for orange for the back, which is his favourite colour. To quilt this one, I used a mixture of hand and machine stitching. I hand quilted from the centre to the points of each star, and around each one in silver, all in DMC perle cotton. Then between the stars I added shooting star "swooshes" by machine.
Starry night quilt
Category: Modern quilts
Machine pieced
Hand and machine quilted
Bloggers Quilt Festival - baby bunting quilt
Well this is the first time I've been organised enough to get anything entered into the Bloggers Quilt Festival which Amy's Creative Side is hosting. Such a great idea for a quilt festival I think!
I'm hoping to enter two quilts, and this is the first - a fairly small, hand-quilted one, in the Hand Quilted category. This quilt was made before I was a blogger, so this is also the first post about it. I did put photos of it on Flickr when it was finished, but took some new ones too for this festival.
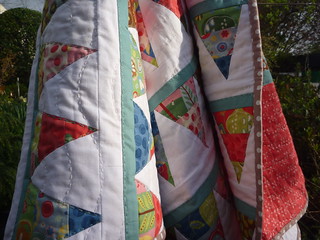
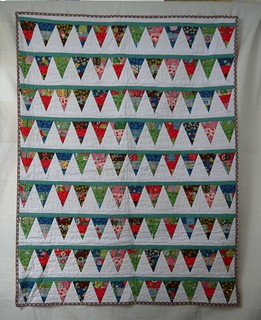
Inspiration for this quilt came from a jelly roll I had never done anything with. I decided to put similar-colour strips together, then cut them into bunting. I did some rapid learning about how to sew triangles into straight rows too! I didn't have an overall plan to start with, so I made some bunting, joined it to white triangles, and stood back to have a look. To string the bunting I added Kona Sage strips - I pretty much made this quilt how I make most of my quilts, making them up as I go along, with no definite idea of how things will turn out!
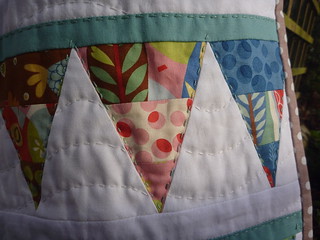
Once the piecing was done and I'd chosen a backing, I hand quilted around the flags, along the top strips, and then in-between the flags with waves, to suggest them fluttering in the wind. All the quilting was done on a traditional frame with DMC perle cotton. The perle is lovely to work with, once you've found a needle which is fine and short enough to quilt with, but has a big enough eye to take the chunky thread.
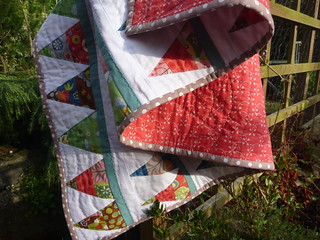
Can't remember how long it took to quilt, but it was less time than the double-bed size one I'd hand quilted previously! Here's a picture of the entire front and back:
And one last picture for you showing the bunting, the quilting and the back. Enjoy the quilt festival!
Baby bunting quilt
Category: Hand quilted quilts
Machine pieced
Hand quilted with DMC perle thread
I'm hoping to enter two quilts, and this is the first - a fairly small, hand-quilted one, in the Hand Quilted category. This quilt was made before I was a blogger, so this is also the first post about it. I did put photos of it on Flickr when it was finished, but took some new ones too for this festival.
Inspiration for this quilt came from a jelly roll I had never done anything with. I decided to put similar-colour strips together, then cut them into bunting. I did some rapid learning about how to sew triangles into straight rows too! I didn't have an overall plan to start with, so I made some bunting, joined it to white triangles, and stood back to have a look. To string the bunting I added Kona Sage strips - I pretty much made this quilt how I make most of my quilts, making them up as I go along, with no definite idea of how things will turn out!
Once the piecing was done and I'd chosen a backing, I hand quilted around the flags, along the top strips, and then in-between the flags with waves, to suggest them fluttering in the wind. All the quilting was done on a traditional frame with DMC perle cotton. The perle is lovely to work with, once you've found a needle which is fine and short enough to quilt with, but has a big enough eye to take the chunky thread.
Can't remember how long it took to quilt, but it was less time than the double-bed size one I'd hand quilted previously! Here's a picture of the entire front and back:
And one last picture for you showing the bunting, the quilting and the back. Enjoy the quilt festival!
Baby bunting quilt
Category: Hand quilted quilts
Machine pieced
Hand quilted with DMC perle thread
Subscribe to:
Posts (Atom)